Read below to learn how to configure Keycloak for Flexopus setup
Step 1: set up SSO
- Create a new Client
Clients > Create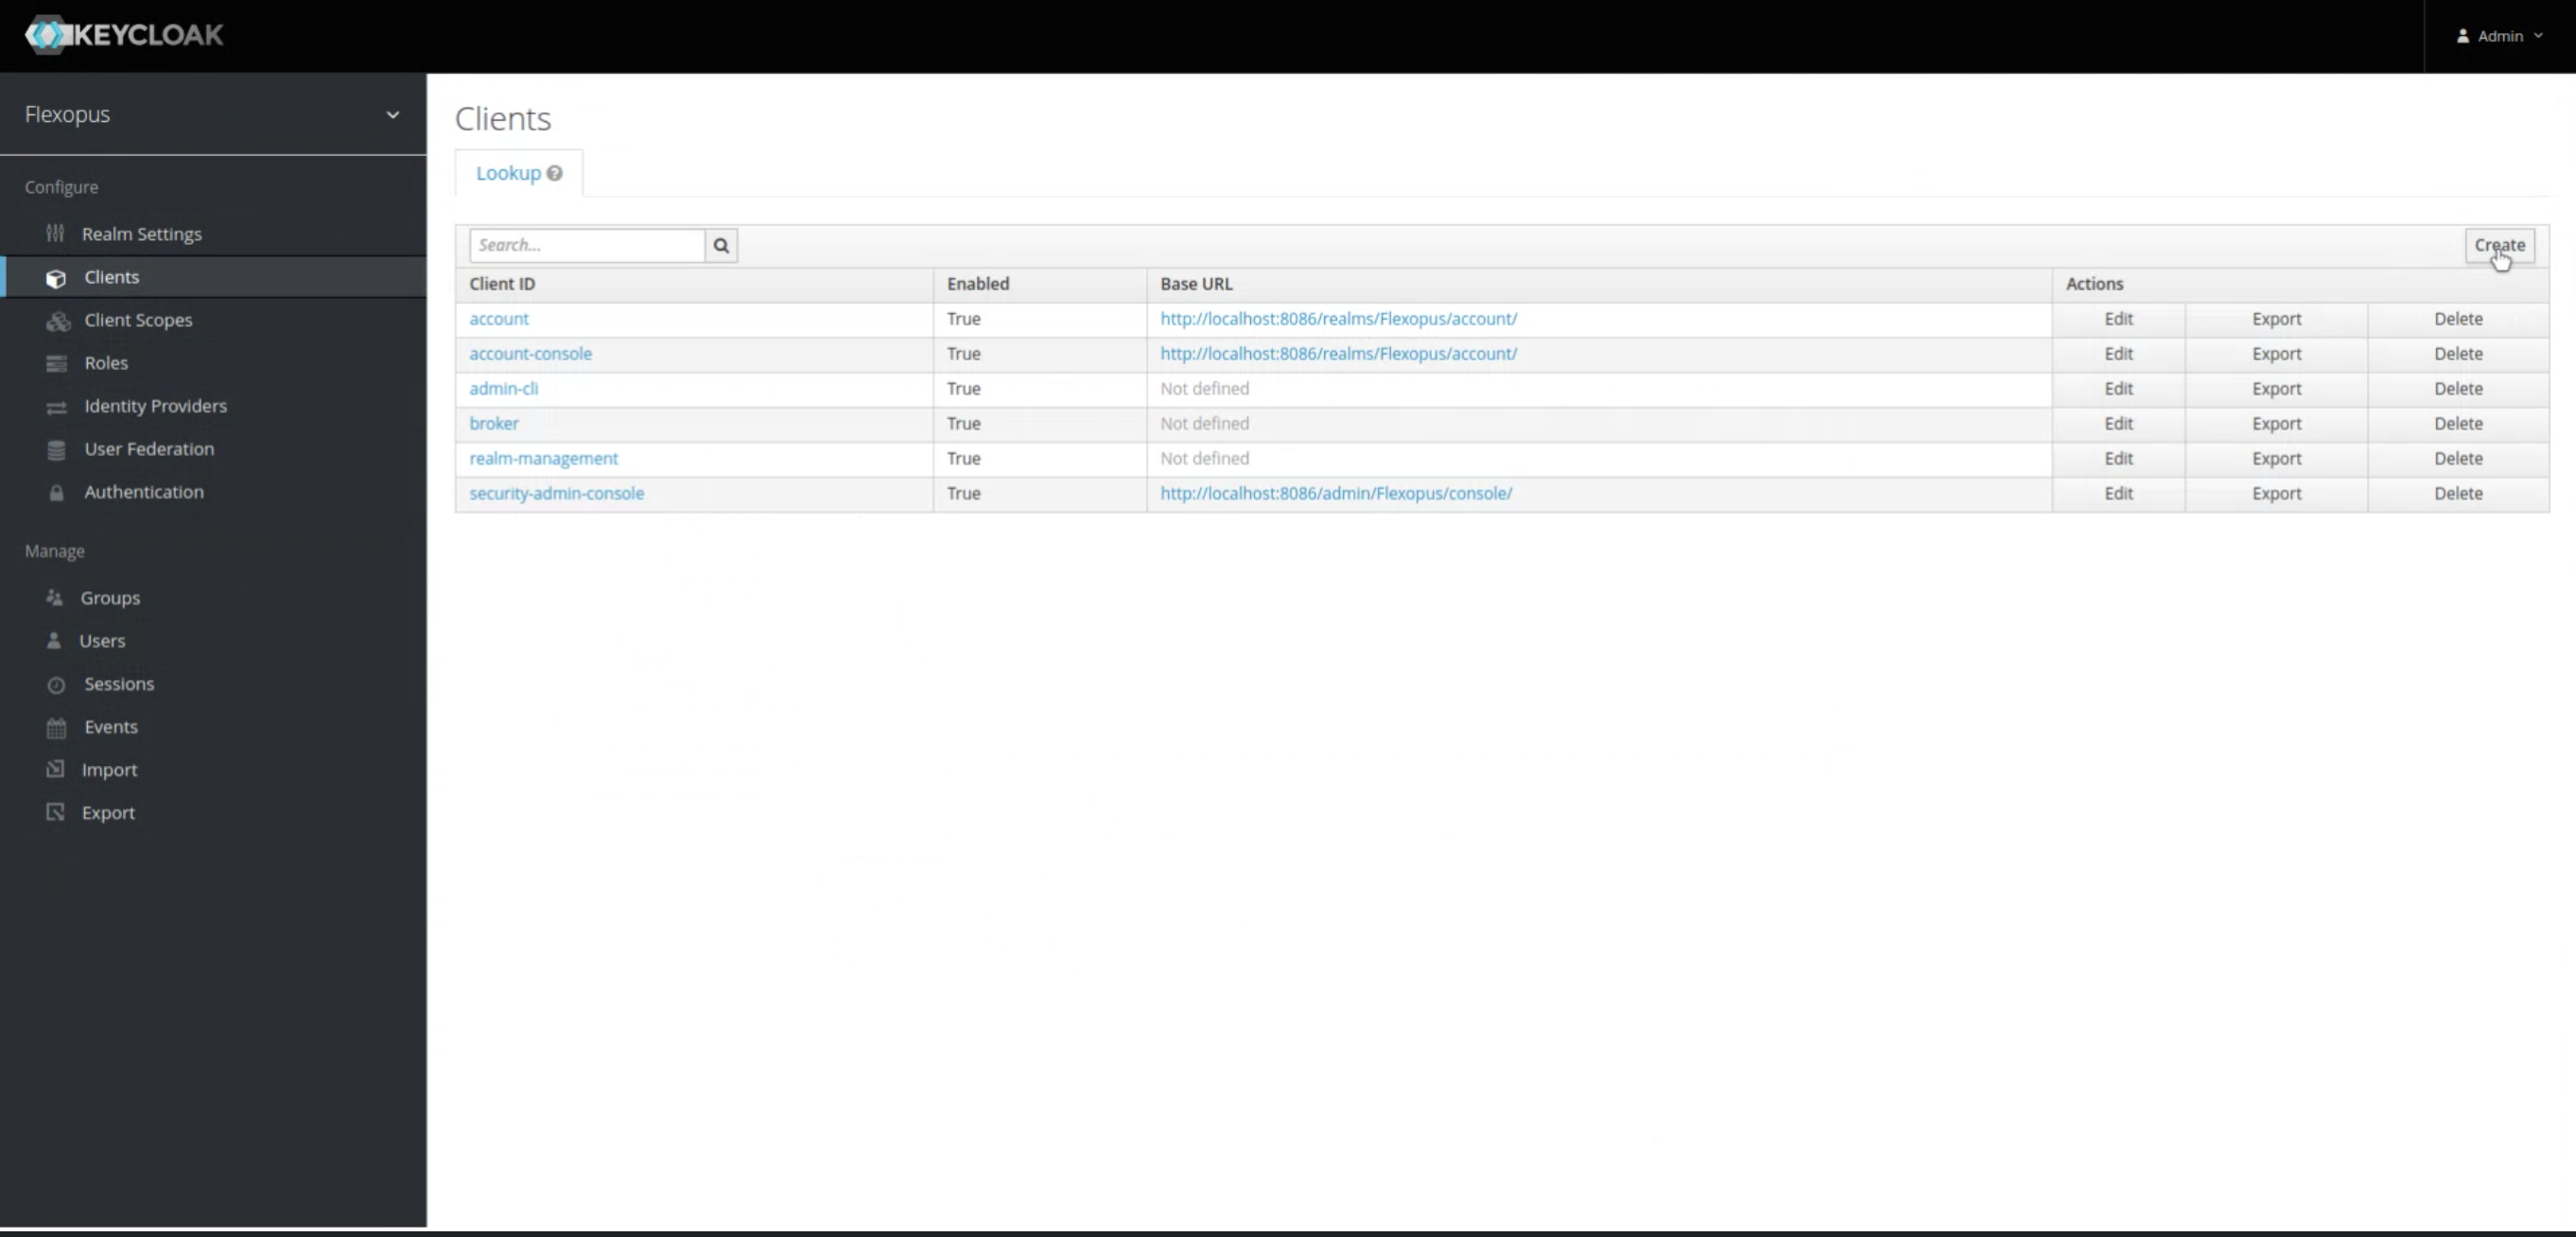
- Add SAML2 app to Flexopus.the Flexopus
Create a new SAML2 connection: Admin Dashboard > Settings > Authentication > Add Provider. You can link several identity providers to Flexopus via SAML2. We already provide separate URLs for each provider:
- Metadata File
- Metadata URL
- Entity ID
- Callback (ACS) URL.
- Download the Metadata File from Flexopus:
Upload this metadata file to KeyCloak.
The Client ID and Client Protocol fields are filled in automatically.
Save your entries.
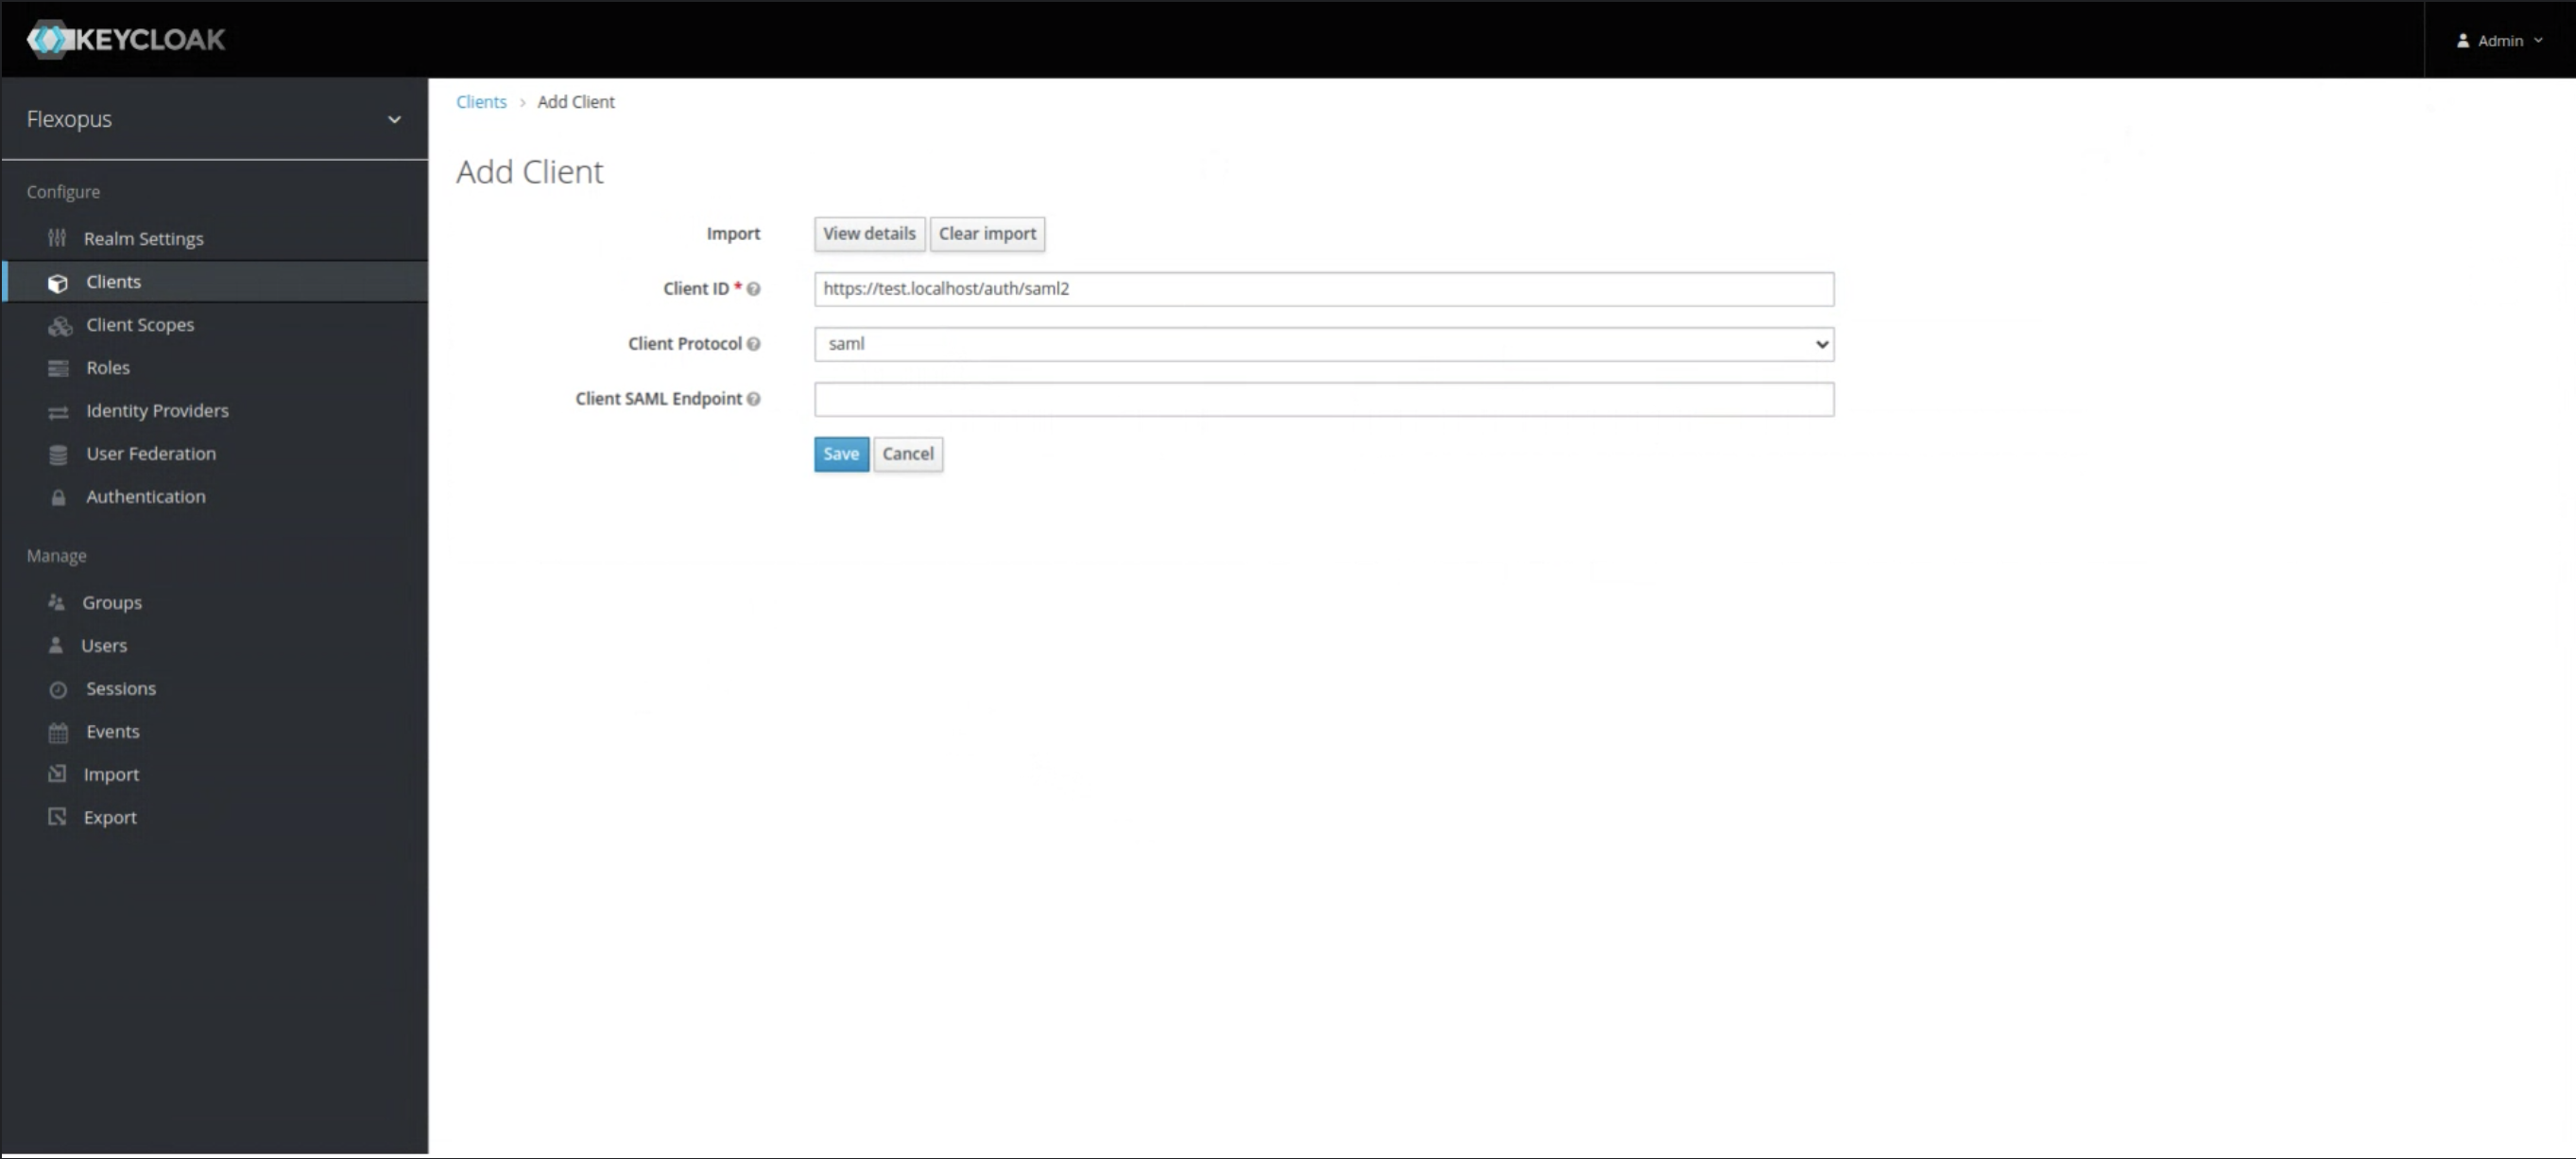
- You do not need to make any changes to the default settings.
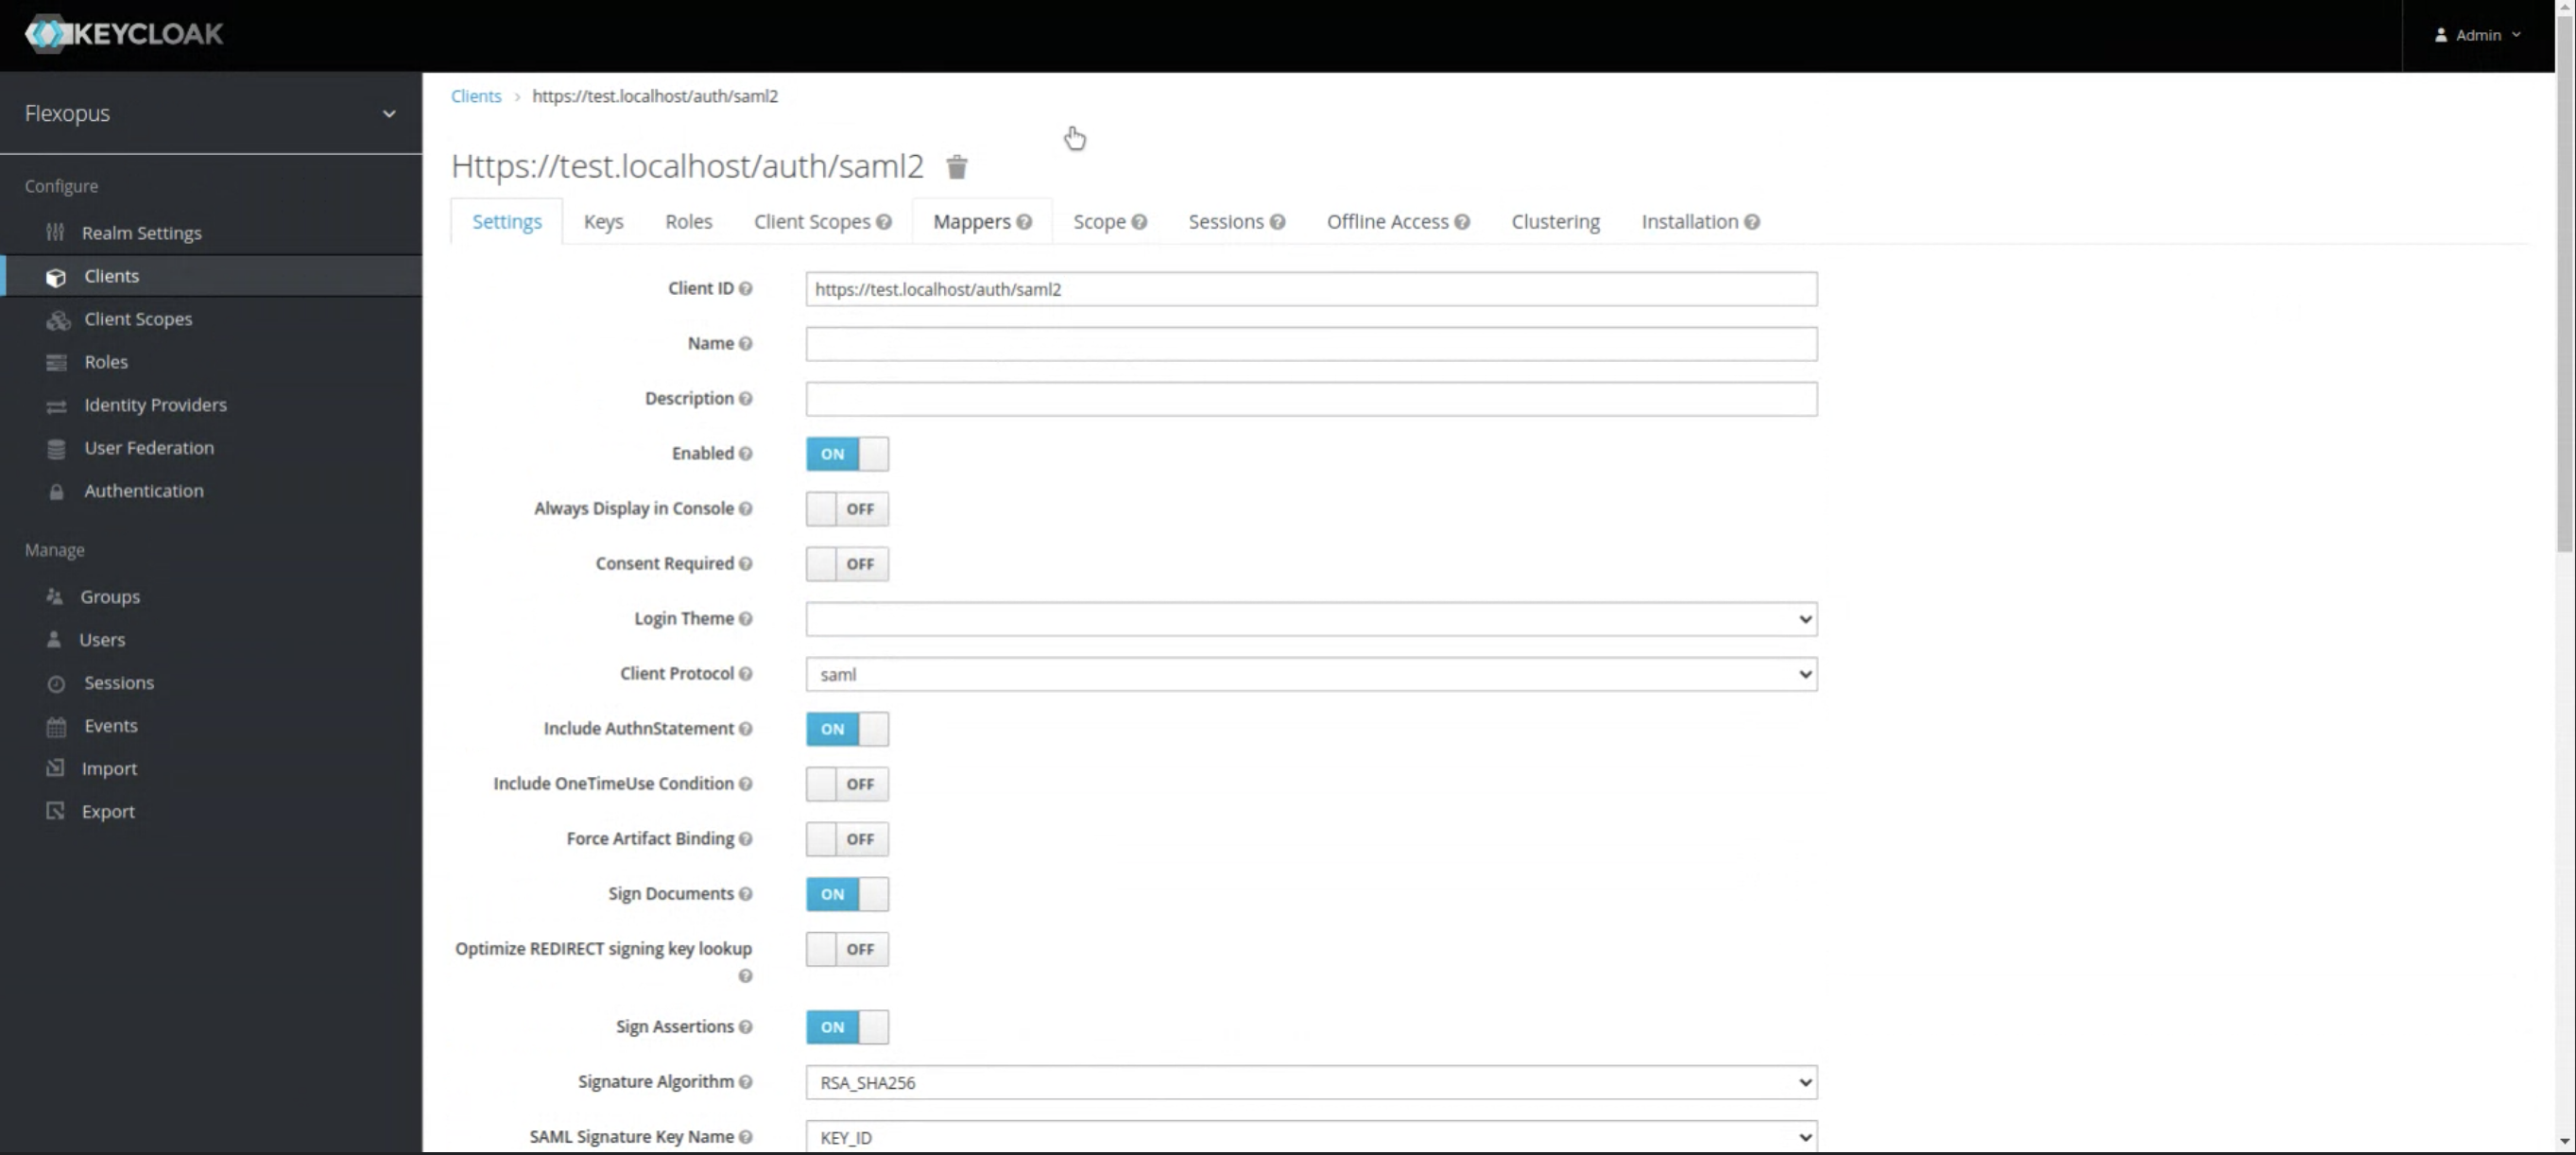
- Click on the Mappers tab and then on the "Add Builtin" button.
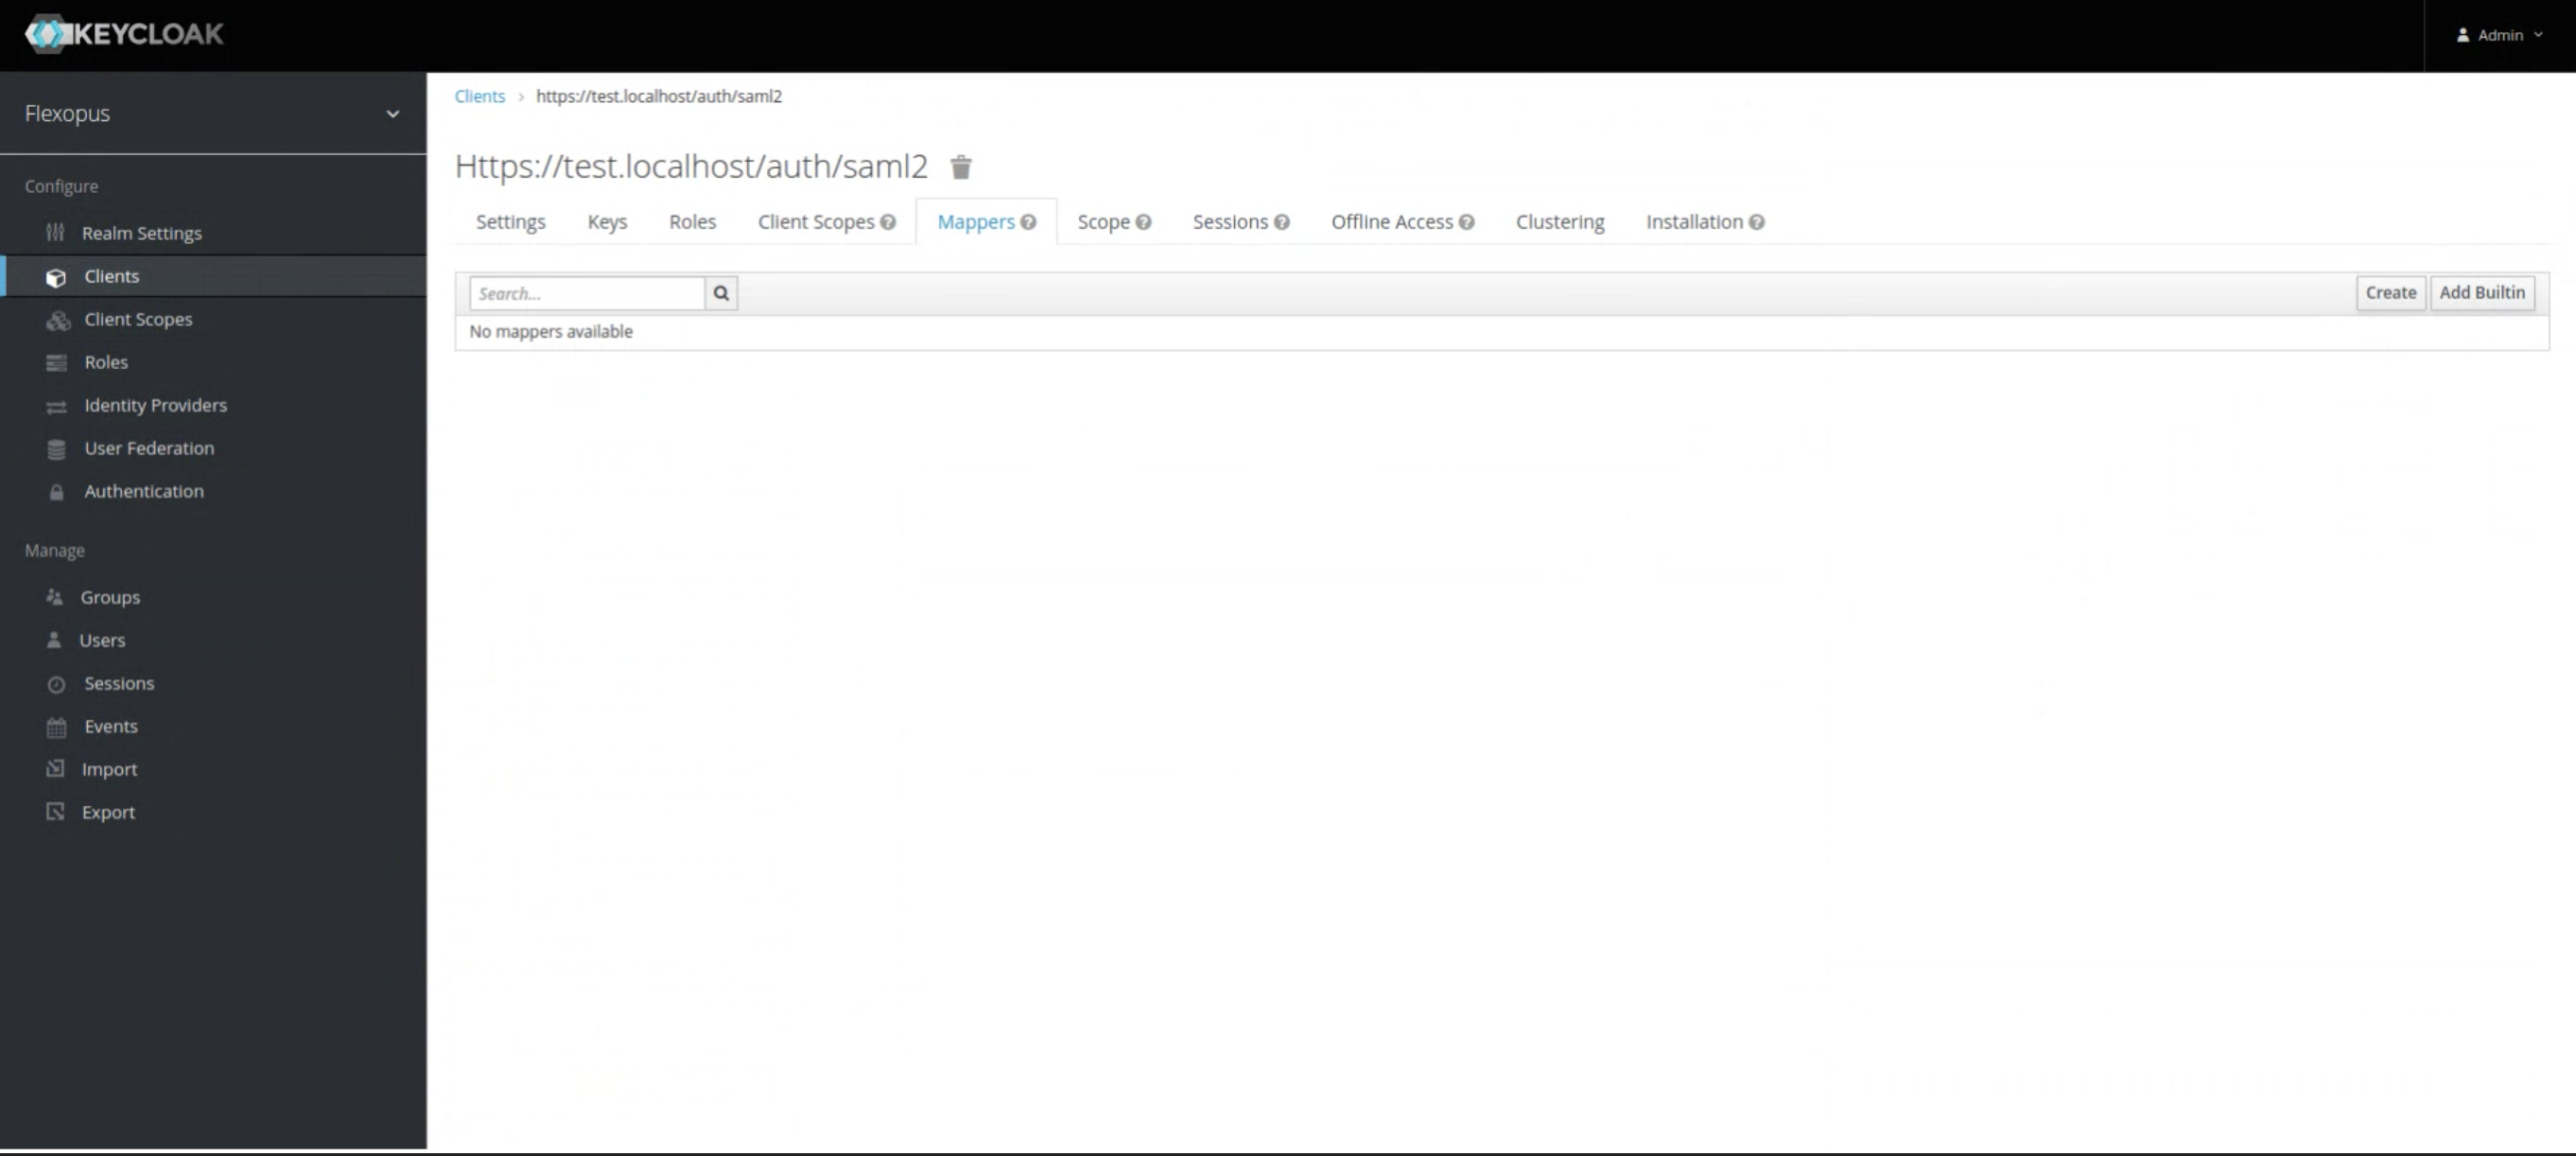
- Select the following options to have the "Default Mappers" applied:
X500 Email, X500 givenname, X500 surname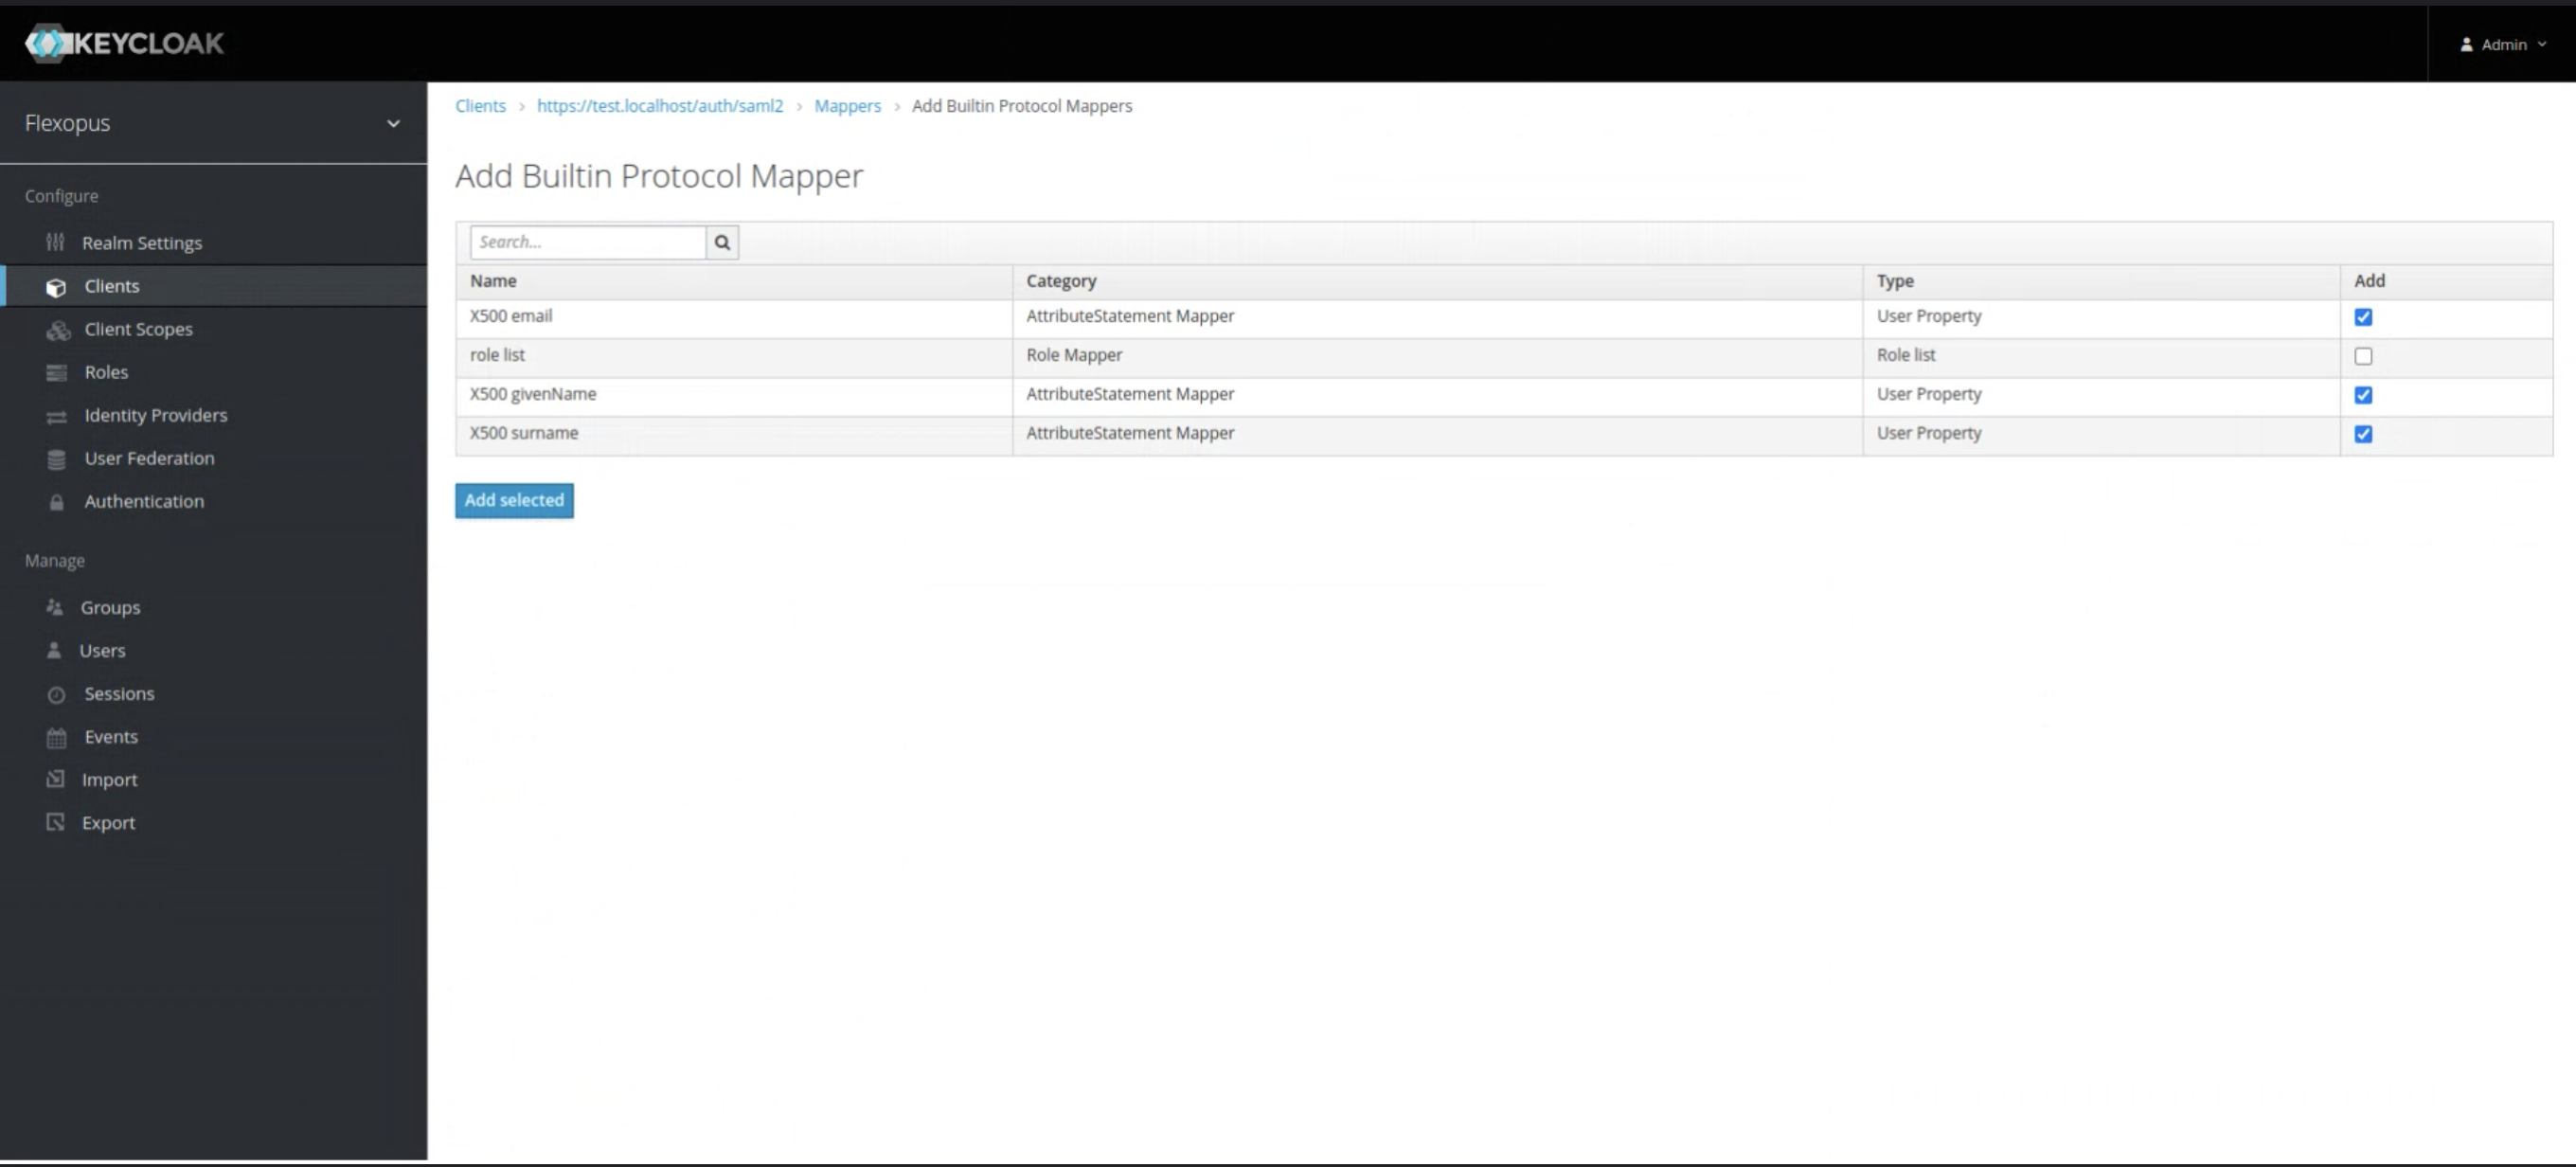
- Add a new Mapper:
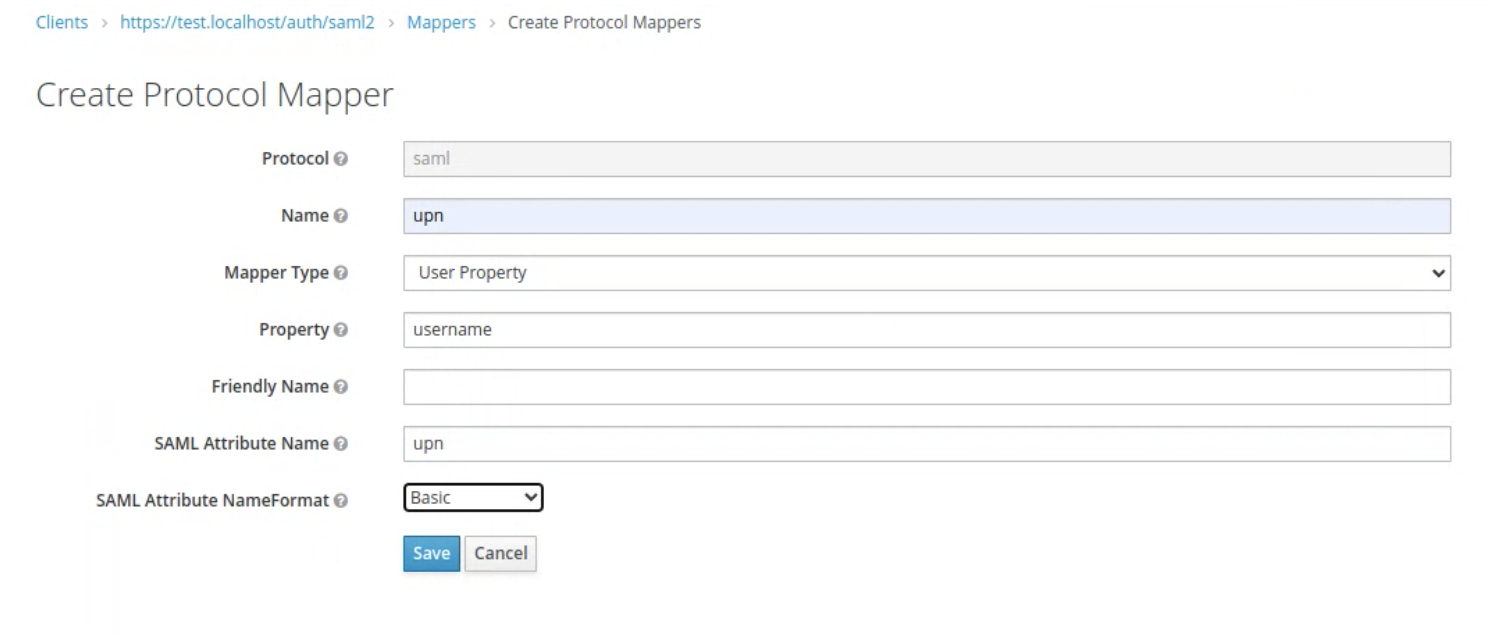
- The result should look like this:

- (Optional) You can also synchronize the Department and Job Title attributes if they exist as text fields in the system.
- In your Flexopus instance you can now store the following URL at METADATA URL:
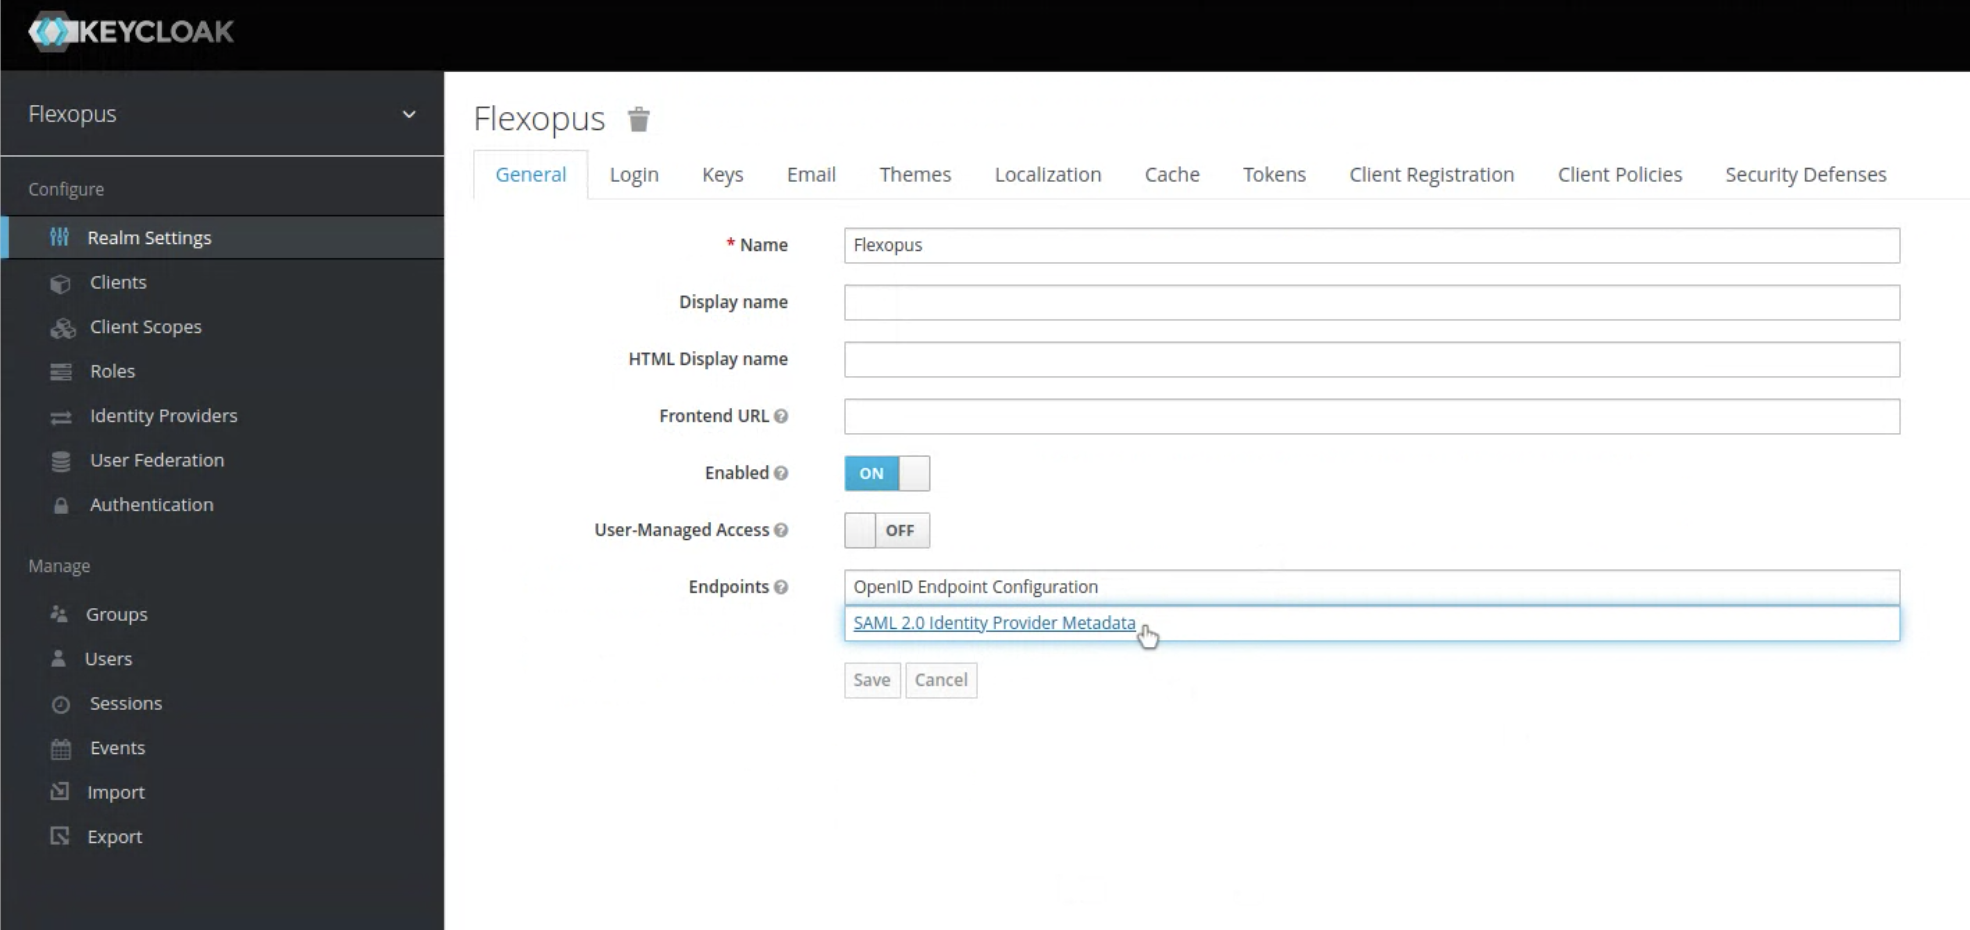
- Go to the Flexopus Dashboard. Select Settings > Authentication > Add provider > SAML2 App.
Activate the SAML2 SSO
Select Metadata URL.
Enter the metadata URL from KeyCloak here.
SAML2 login label: SSO login
Synchronize groups: Deactivated
Do not forget to save the settings. - Now you can test the connection by logging out of Flexopus and logging in using the new login button.
Step 2: Set up group synchronisation with SAML2 attributes
- Read the following instructions: https://help.flexopus.com/en/group-synchronisation-through-saml2
- Add a new Mapper: memberOf
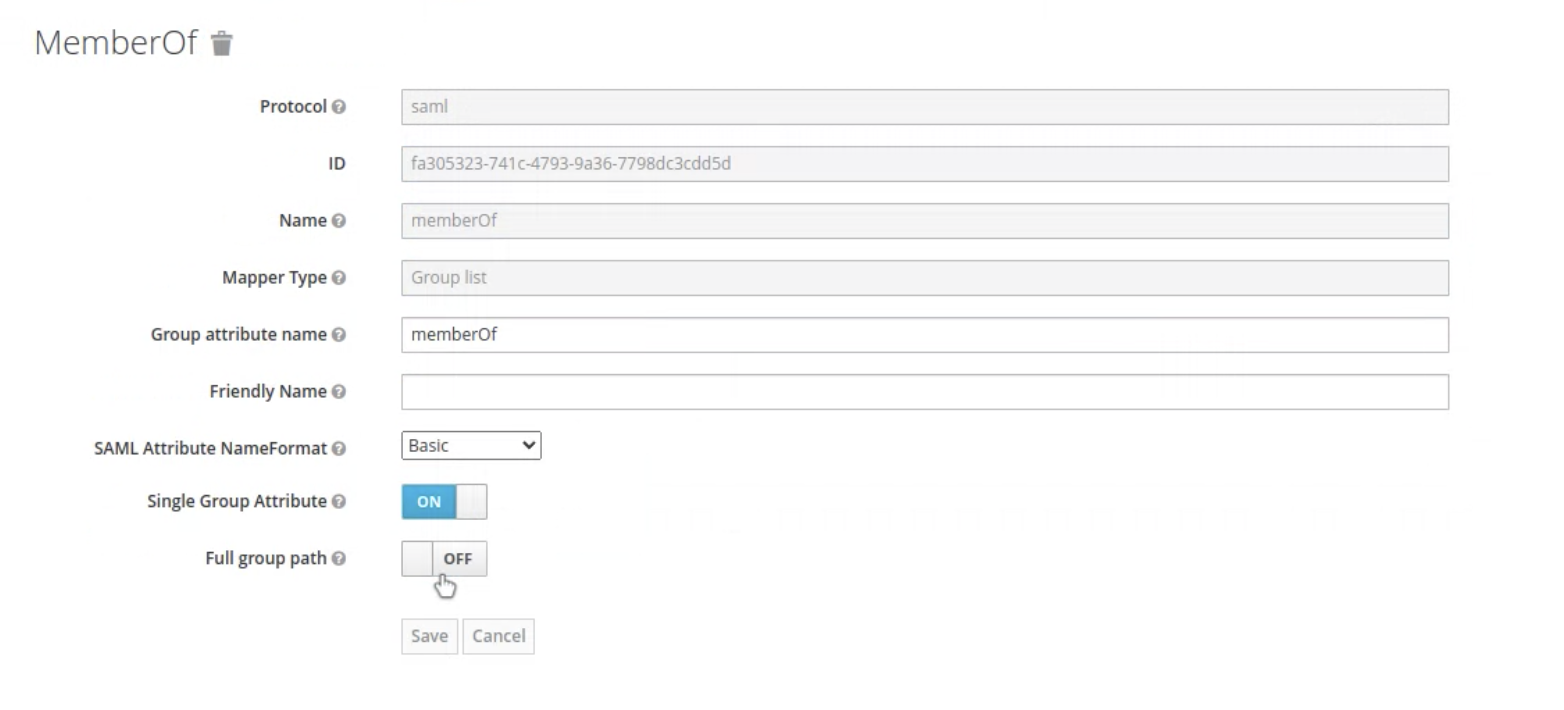
- The result should look like this:

- In Flexopus, select the "Array" option for SAML2 group synchronization.:
- Log in again and then check whether the groups have been transferred.
If you have any questions you can contact us at any time: support@flexopus.com
R0052