Okta can be connected to Flexopus via the standard authentication protocol SAML2. You can also configure the SCIM API for user synchronization.
This article will cover the following instructions:
- What is Okta?
- SAML2 Single Sign On (SSO) configuration between Okta and Flexopus for user authentication
- SCIM API configuration between Okta and Flexopus for user and group provisioning
- OKTA SCIM Workaround
What is Okta?
It's an enterprise-grade, identity management service, built for the cloud, but compatible with many on-premises applications. With Okta, IT can manage any employee's access to any application or device. Okta runs in the cloud, on a secure, reliable, extensively audited platform, which integrates deeply with on-premises applications, directories, and identity management systems.
Visit the official website for more information: https://www.okta.com/
SAML2 Single Sign On (SSO) configuration between Okta and Flexopus for user authentication
Follow the instructions:
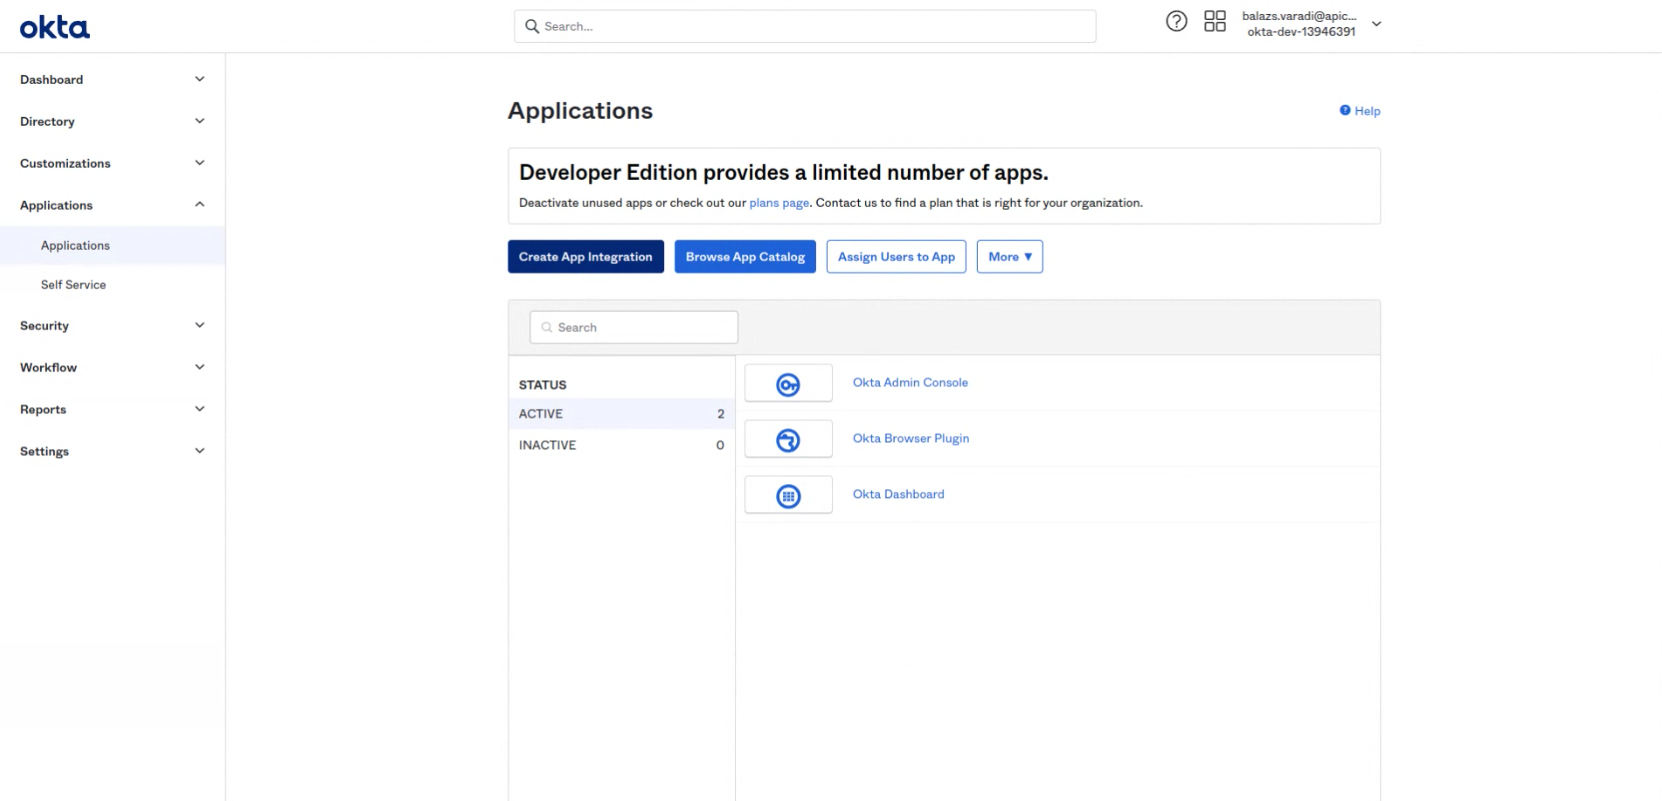
- Go to your Okta Dashboard and click on the Applications > Applications tab on the Create App Integration Button.
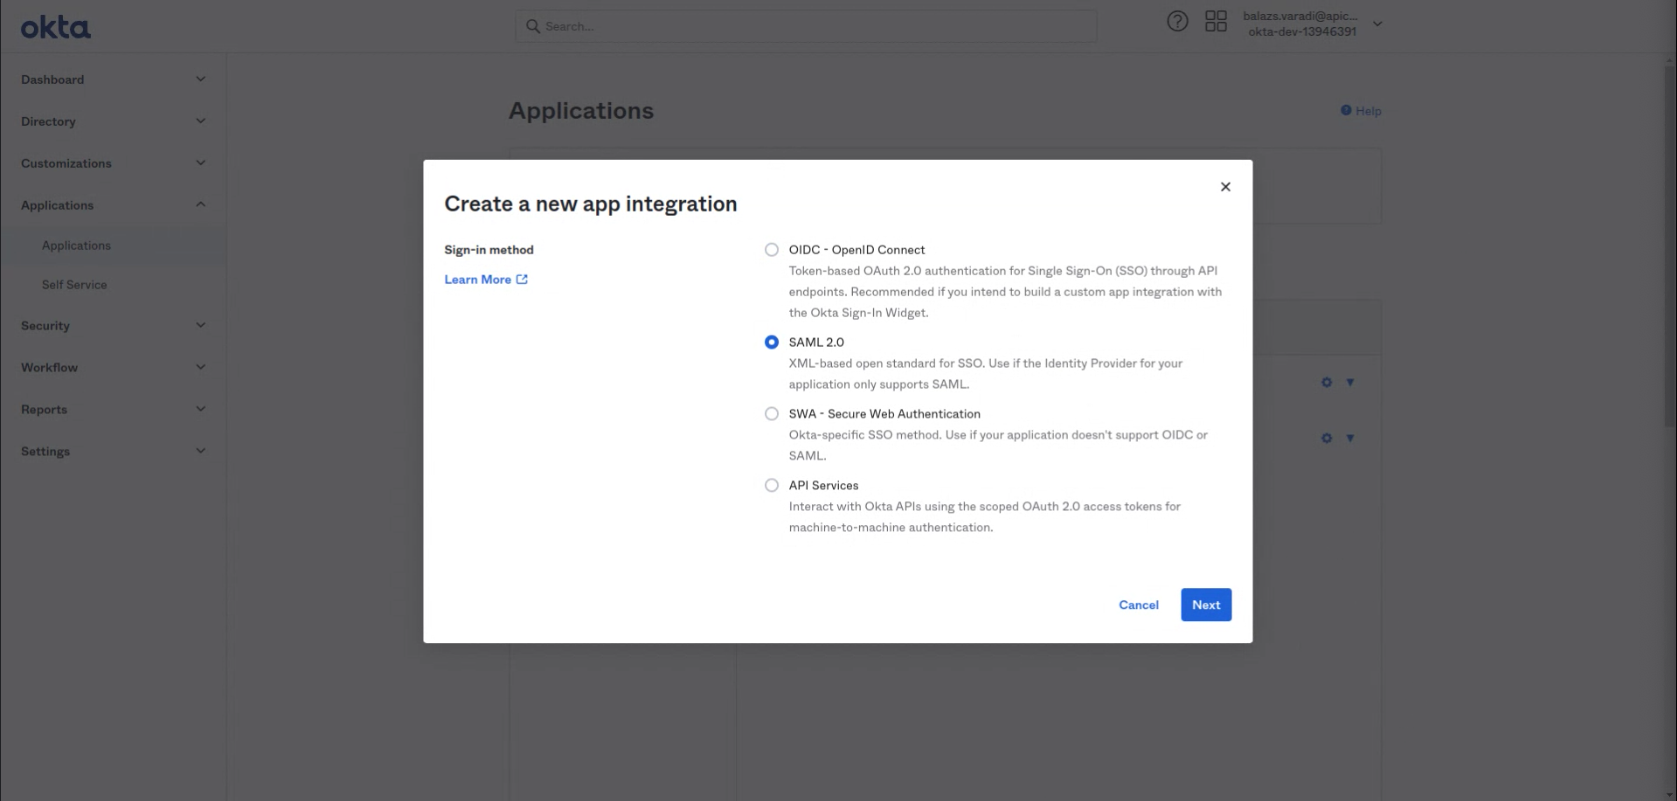
- A popup will open. Select the SAML2.0 option and click on "Next".
- App name: Flexopus
Logo: Leave it empty.
Option: Leave the unselected.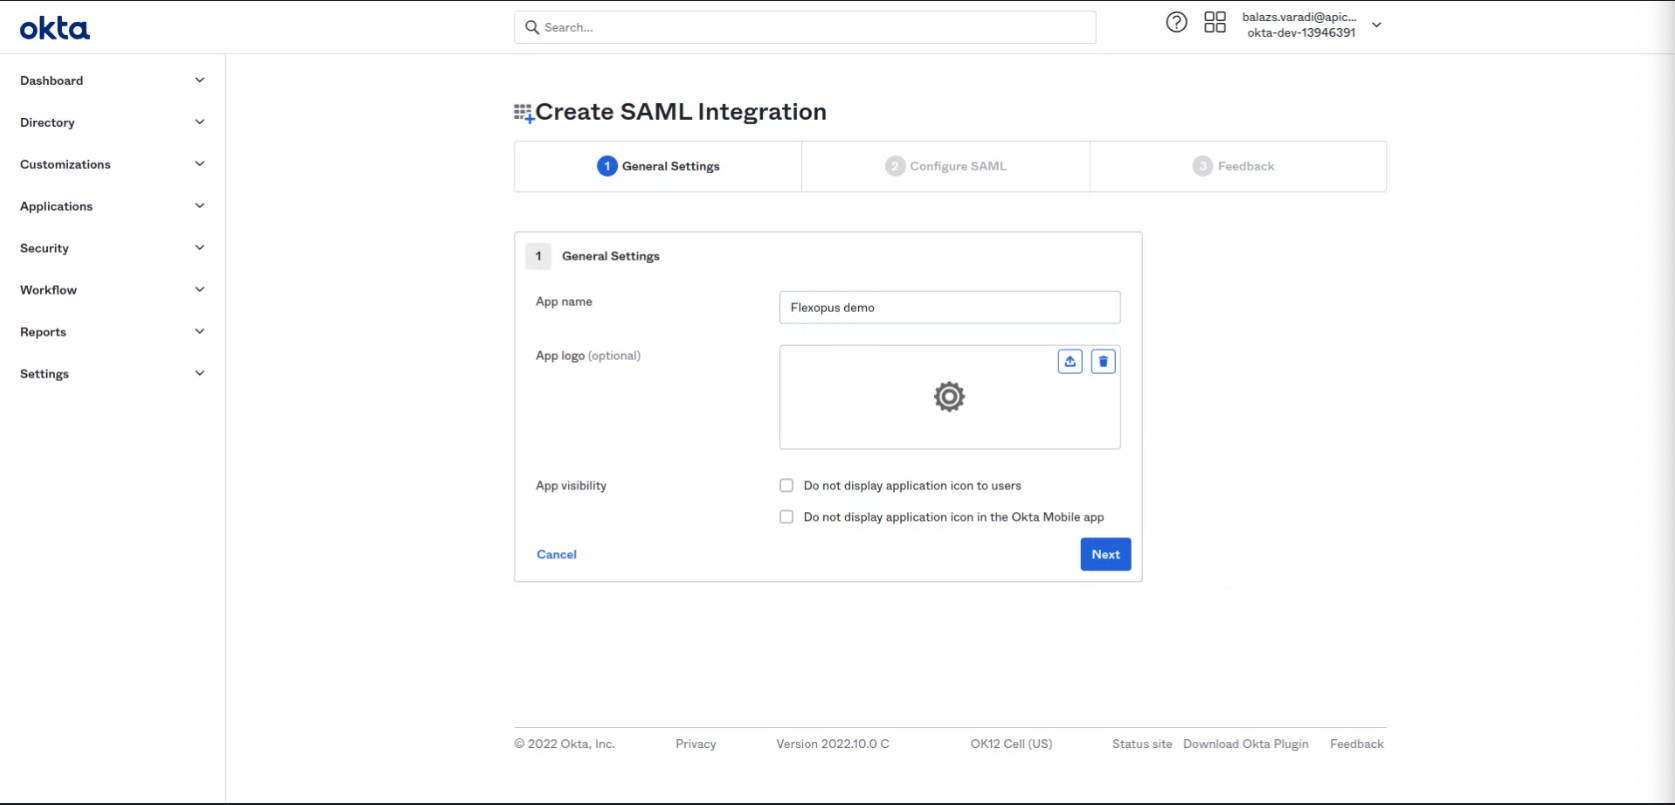
- Single sign On URL:
https://{your-flexopus-domain}/internal-api/auth/integrations/saml2/callbackAudience URl (SP Entity ID) :https://{your-flexopus-domain}/auth/saml2Name ID format: Persisten
Default RelayState: initiate-sp-login 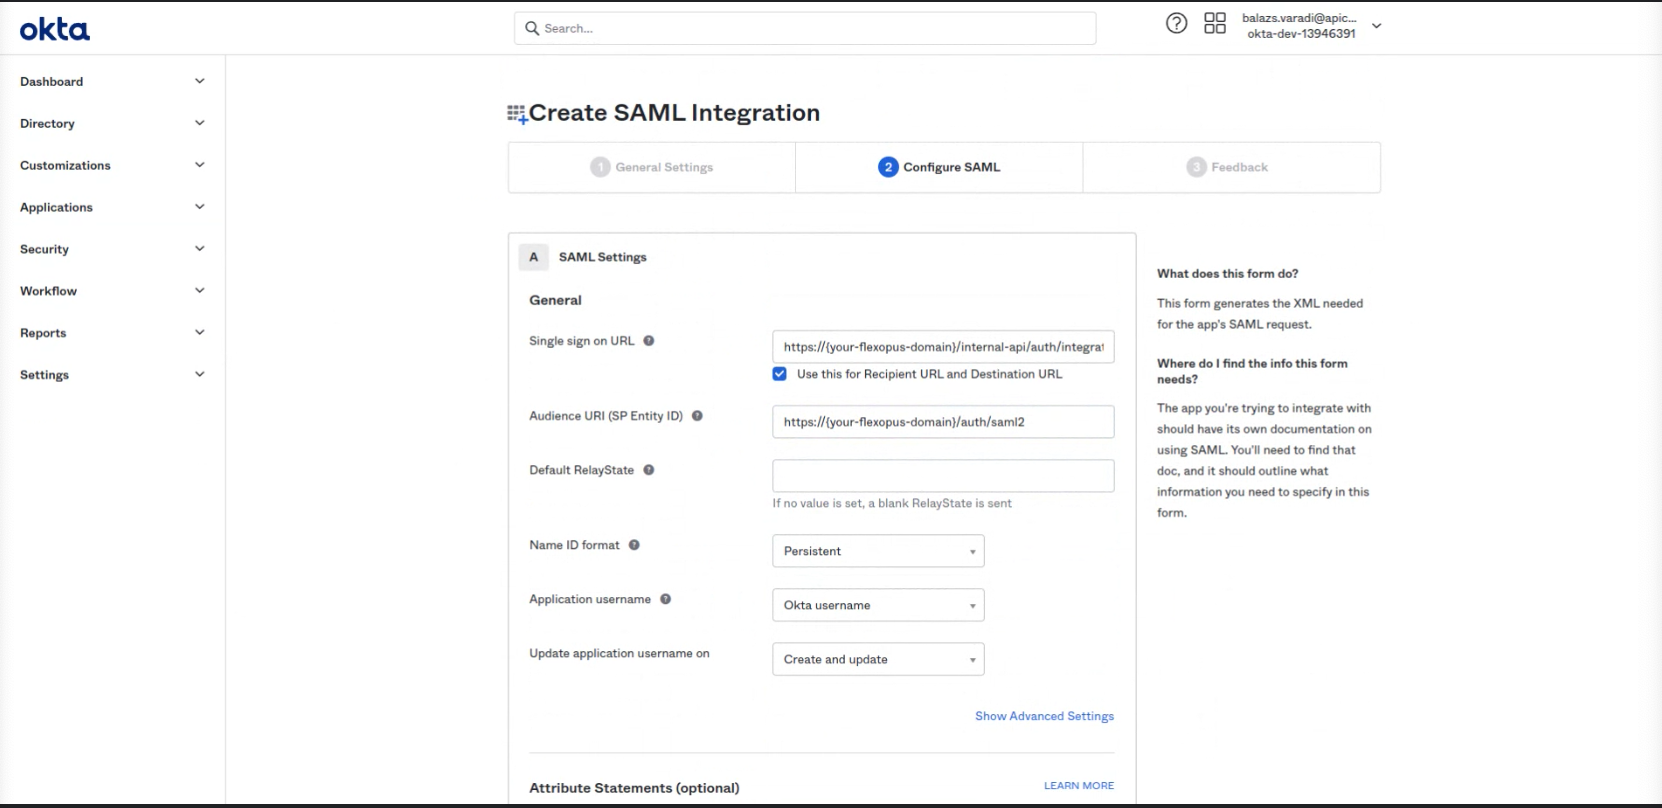
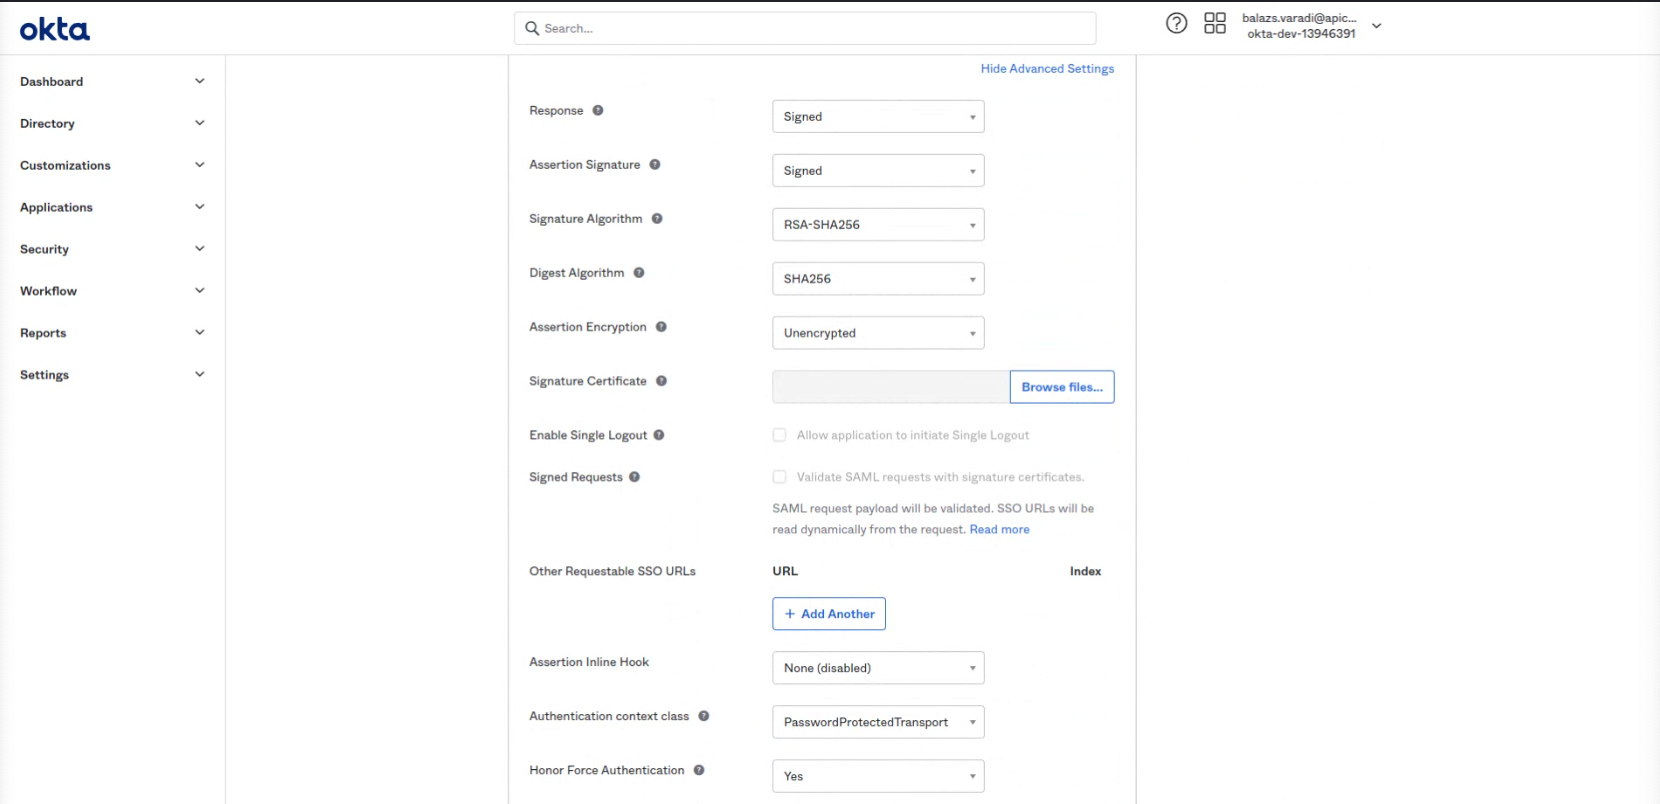
- No need to change the Advanced Settings, still here is a screenshot about the default settings:
- Select: I'm an Okta customer adding an internal app
Select: It's required to contact the vendor to enable SAML
You can optionally give some information to Okta about Flexopus:
(optional) First Field: https://flexopus.com
(optional) Second Field: https://help.flexopus.com/de/integration-okta-sso
(optional) Third Field: no tips and additional comments.
Click on "Finish" at the end.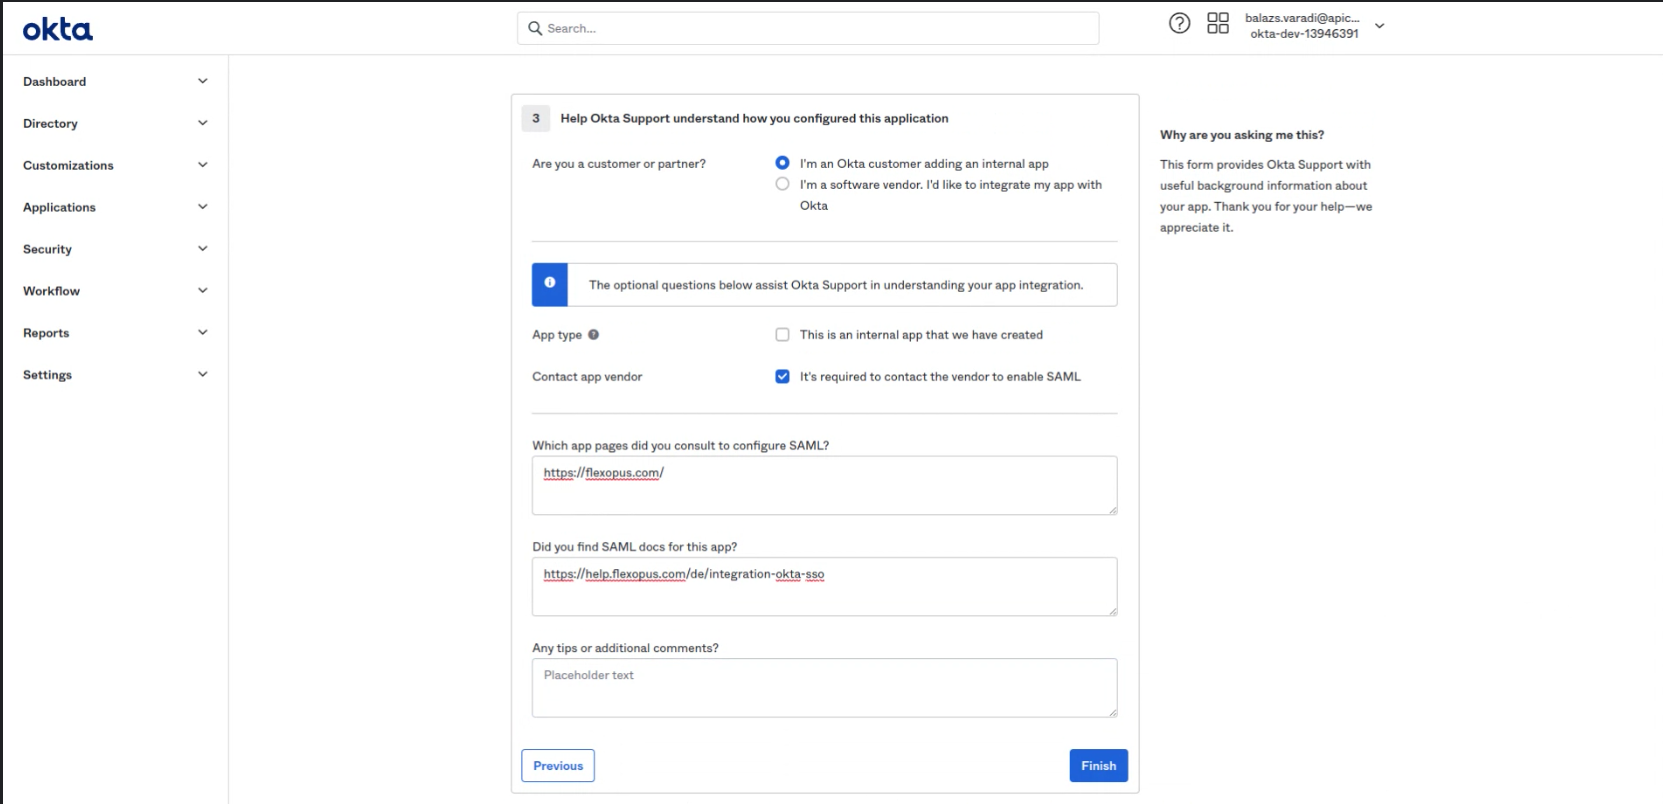
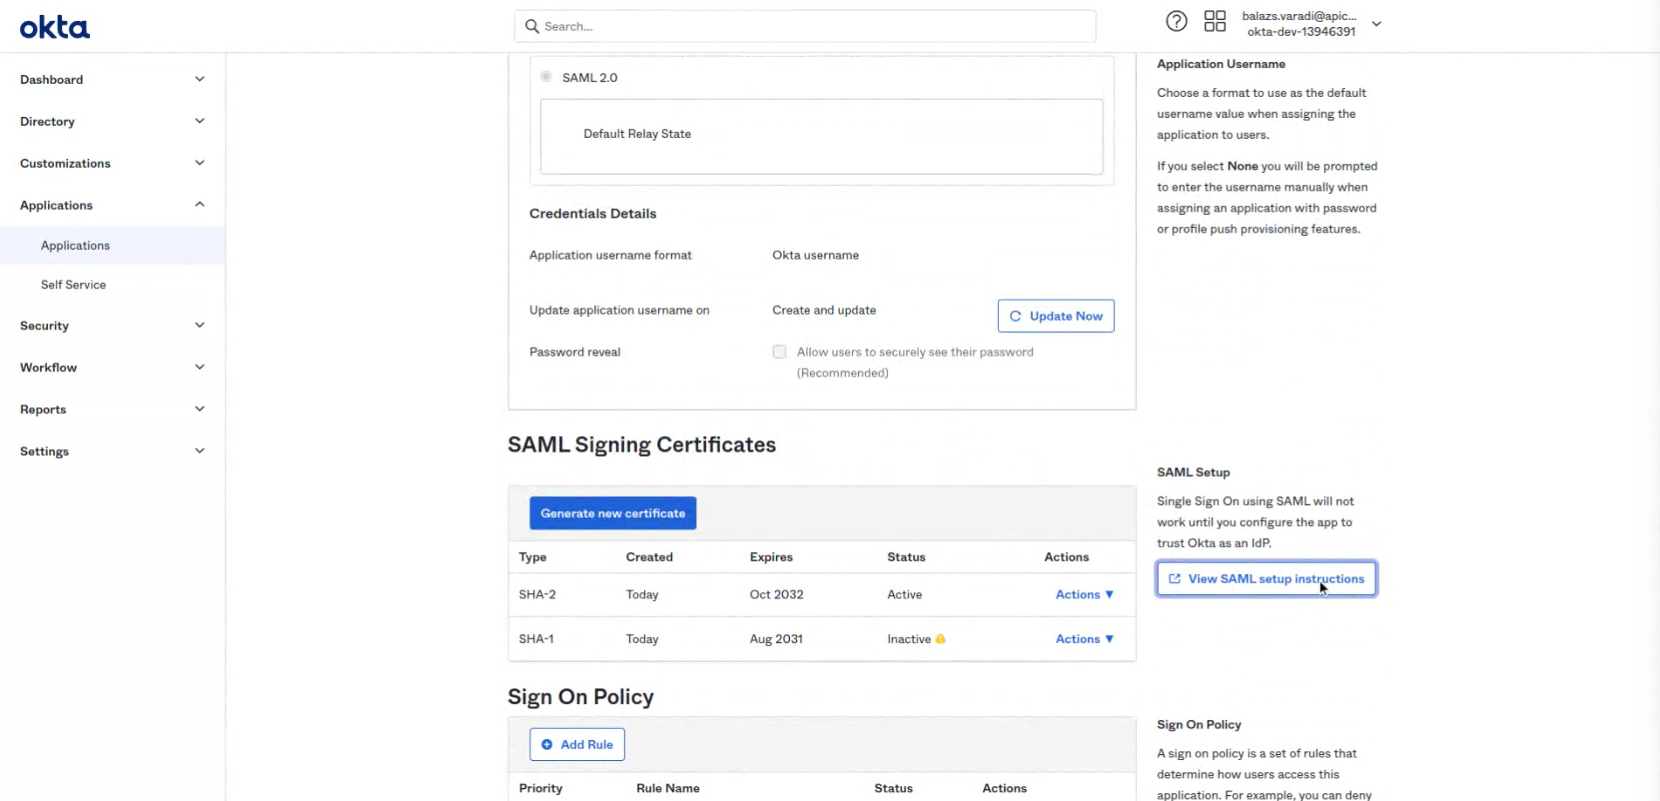
- Click on the "View SAML setup instructions"
- Configure the correct attribute mappings.
*Note that the department and the jobtitle is only an optional attribute for Flexopus. You can also leave it empty.
Name Name format Value http://schemas.xmlsoap.org/ws/2005/05/identity/claims/givenname URl Reference user.firstname http://schemas.xmlsoap.org/ws/2005/05/identity/claims/emailaddress URl Reference user.email http://schemas.xmlsoap.org/ws/2005/05/identity/claims/upn URl Reference user.login http://schemas.xmlsoap.org/ws/2005/05/identity/claims/surname URl Reference user.lastName department Basic user.department jobtitle Basic user.title http://schemas.xmlsoap.org/ws/2005/05/identity/claims/name URl Reference user.displayName 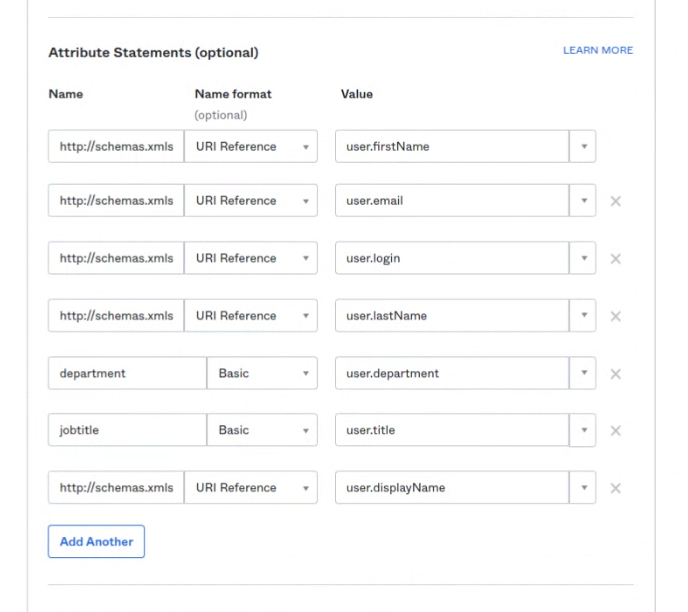
- To finish the configuration, we need to share the metadata with Flexopus. Since Okta provides neither a direct metadata URL nor a Metadata File, you need to create the Metadata file for yourself like this:
Copy the content of the optional field in the bottom called: "Provide the following IDP metadata to your SP provider."
Create an empty XML file locally on your PC and copy the content into it.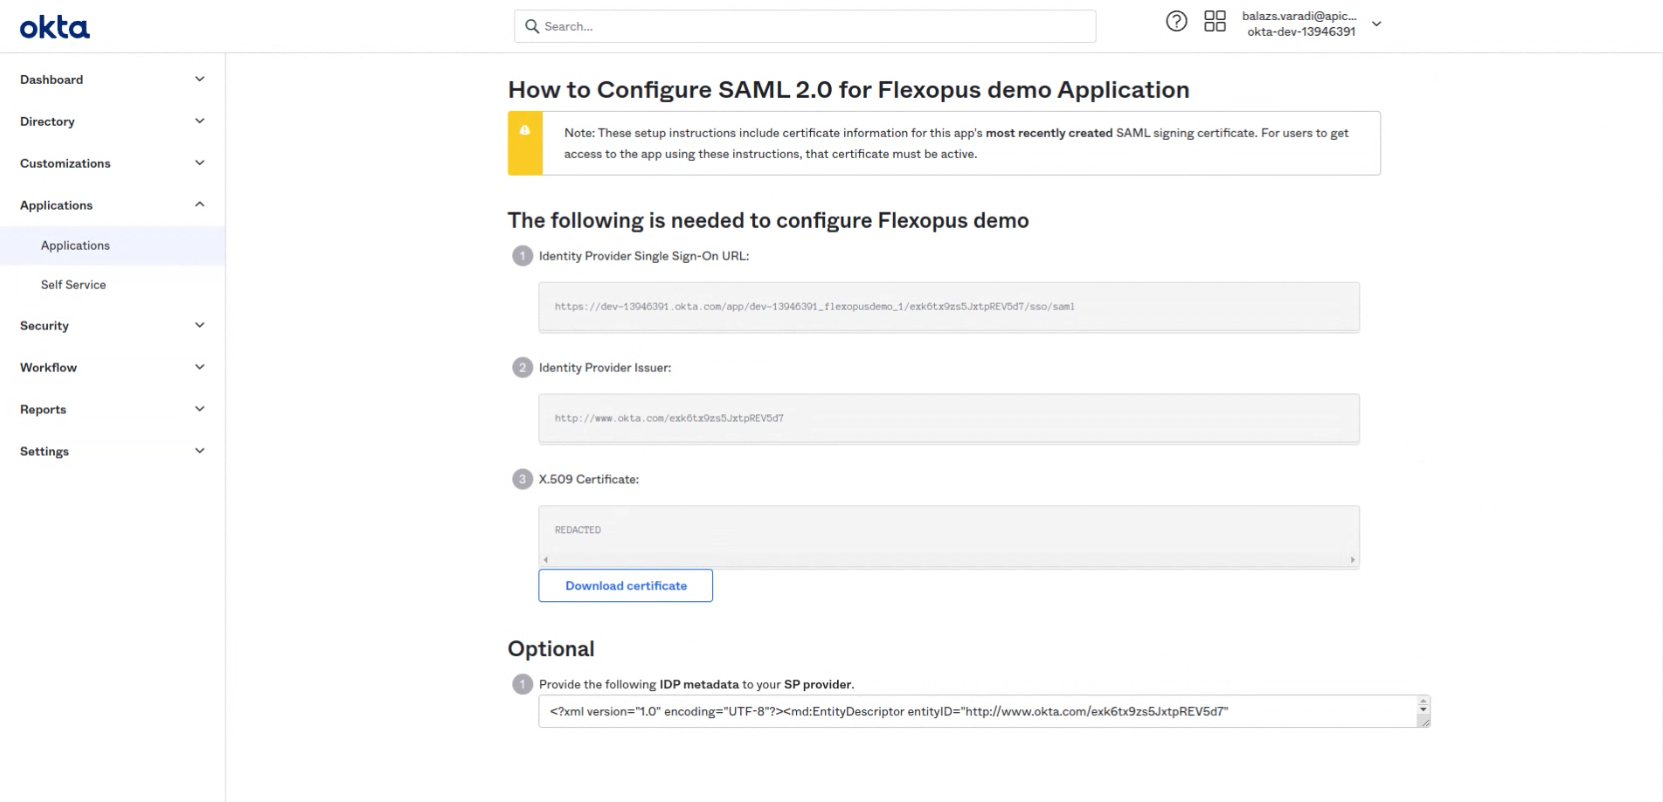
- Go to the Flexopus Dashboard. Settings > Authentication > Add provider > SAML2 SSO
Activate the SAML2 SSO
Select the configuration method 'Metadata File'
Upload the XML File
SAML2 Label: SSO Login (this will be text on the login button)
Synchronize Groups: Leave it empty. This is only relevant for the customers that have no SCIM connection at their IDP provider. Okta provides a SCIM API for group and user provisioning.
Don't forget to save the settings in the bottom.
- Assign a test user to the application and test the connection at Flexopus.
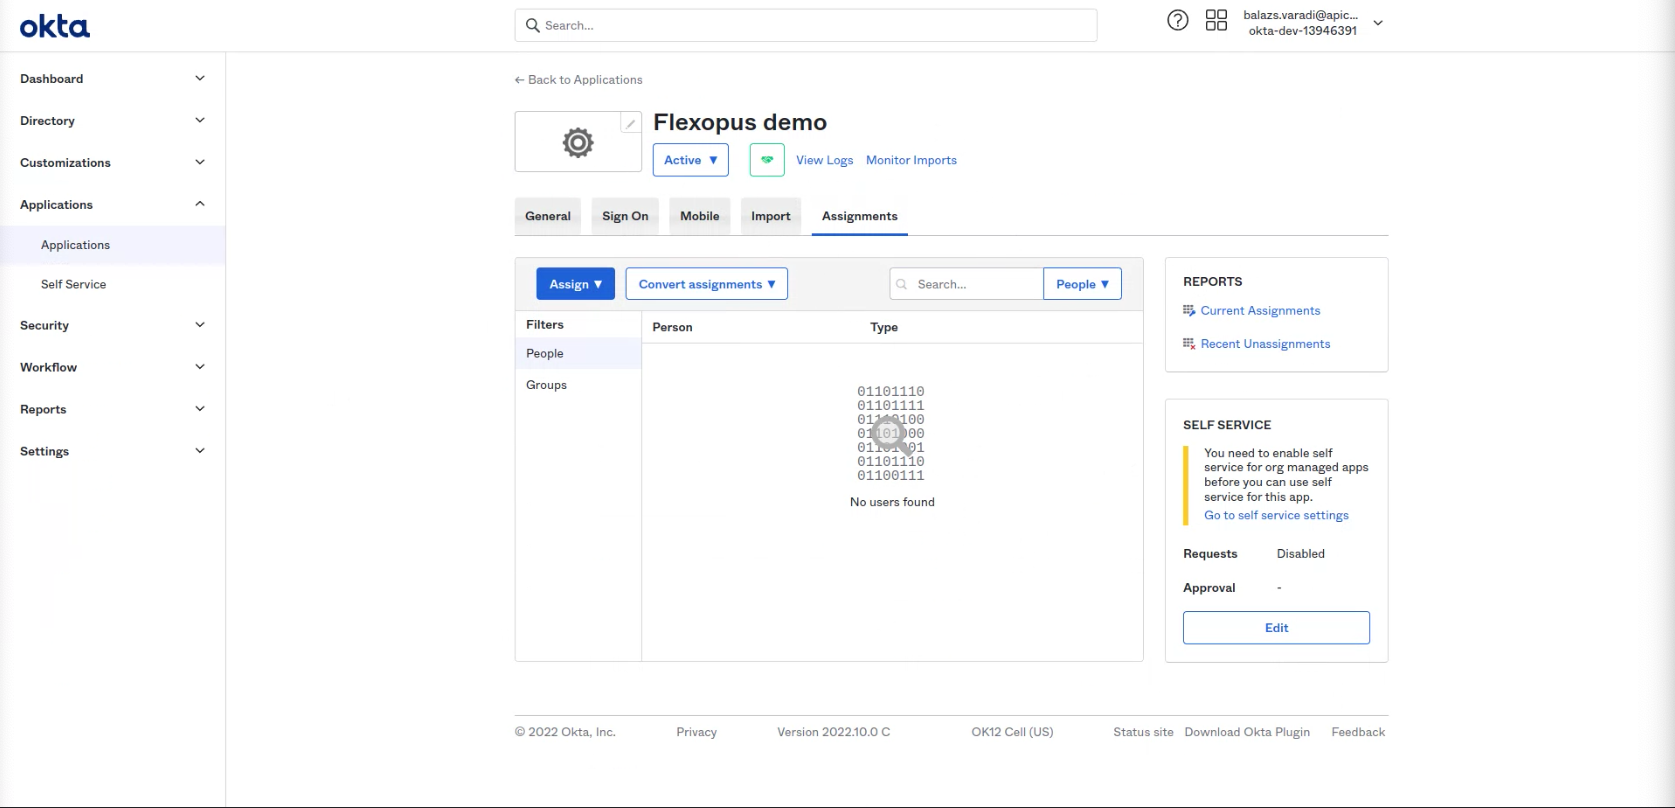
- (optional) If you want to use only the SSO for login, deactivate the Password + Email login form at Flexopus (We recommend doing it after you finished the SCIM configuration.):

- (optional) Troubleshooting:
Please check the configuration manual again or contact our support: support@flexopus.com
SCIM API configuration between Okta and Flexopus for user and group provisioning
IMPORTANT!
The custom standard SCIM provisioning at OKTA is not working at the moment as intended. An issue was reported to the OKTA technical support team. Please skip this configuration manual and execute the configuration prozess as described in the OKTA SCIM WORKAROUND section (scroll down)
Date: 2023-10-30
Optionally, you can also configure a user and group provisioning between Okta and Flexopus.
Follow the instructions to configure SCIM:
- Click on "Edit" at the App Settings
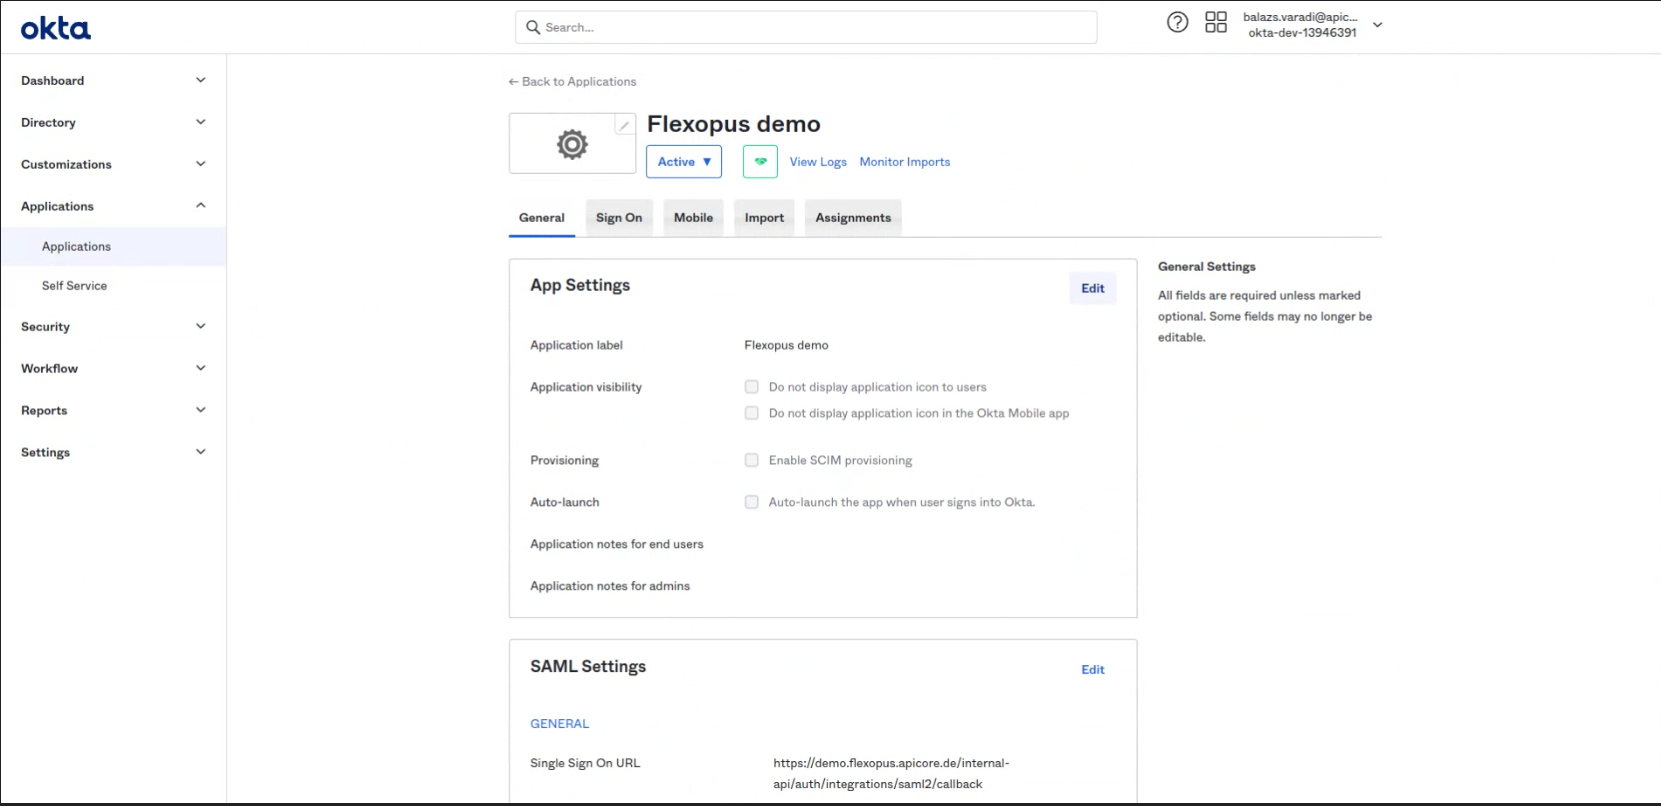
- Select: Enable SCIM provisioning
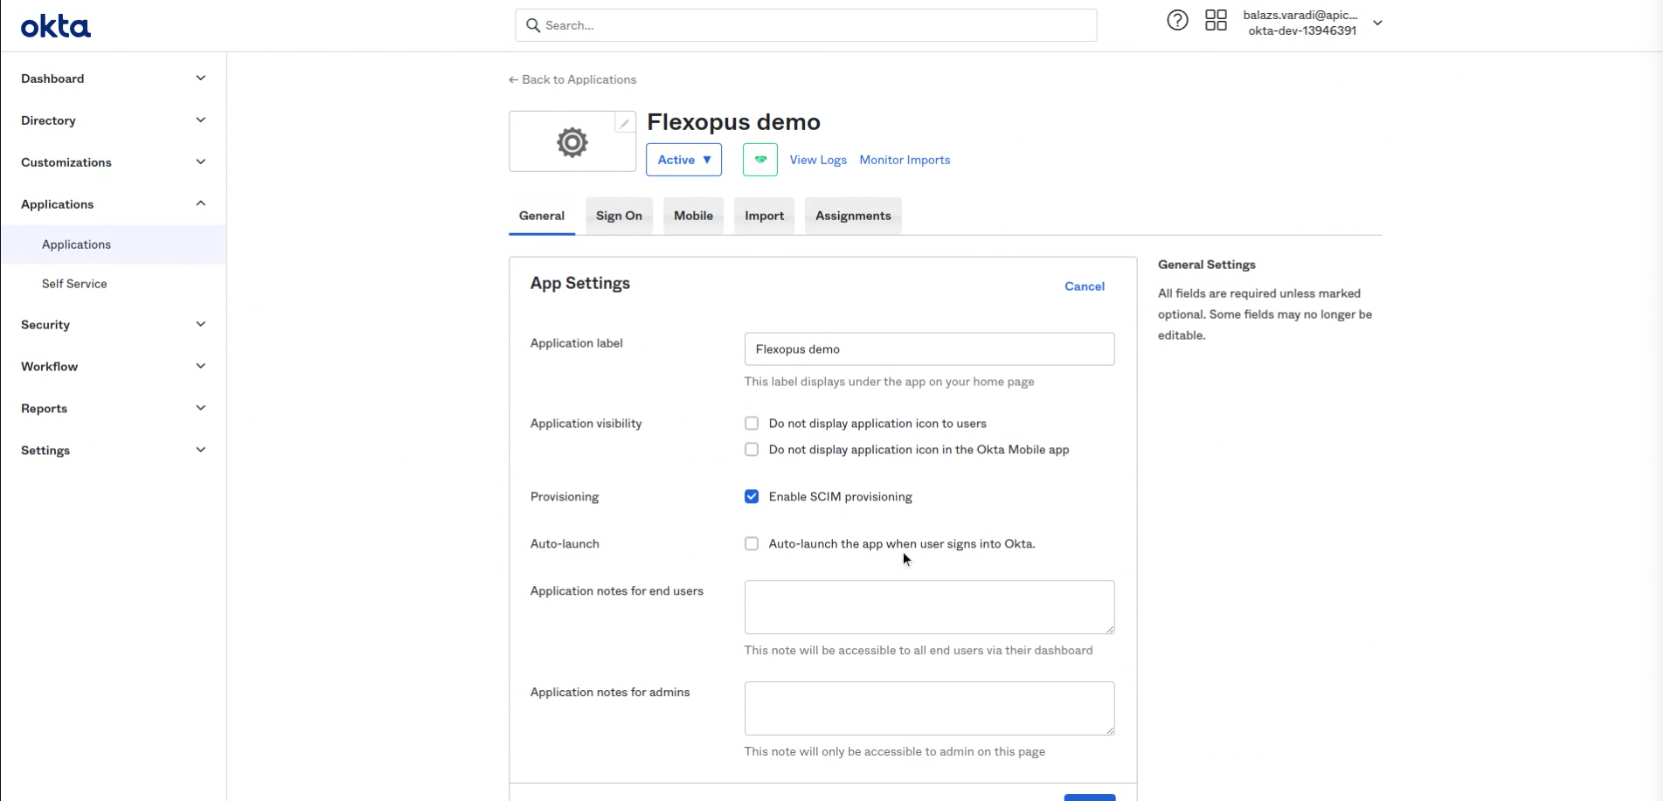
- A new tab appears: Provisioning.
Visit the Provisioning tab and click on "Edit" - SCIM connector base URL: https://{your-flexopus-domain}/api/scim/v2
Unique identifier field for users: userName
Select options: Push New Users, Push Profile Updates, Push Groups
Select option: HTTP Header
Generate a token in Flexopus. (Settings > Single Sign On / Integrations > SCIM)
Save
DO NOT SELECT "IMPORT GROUPS"!!!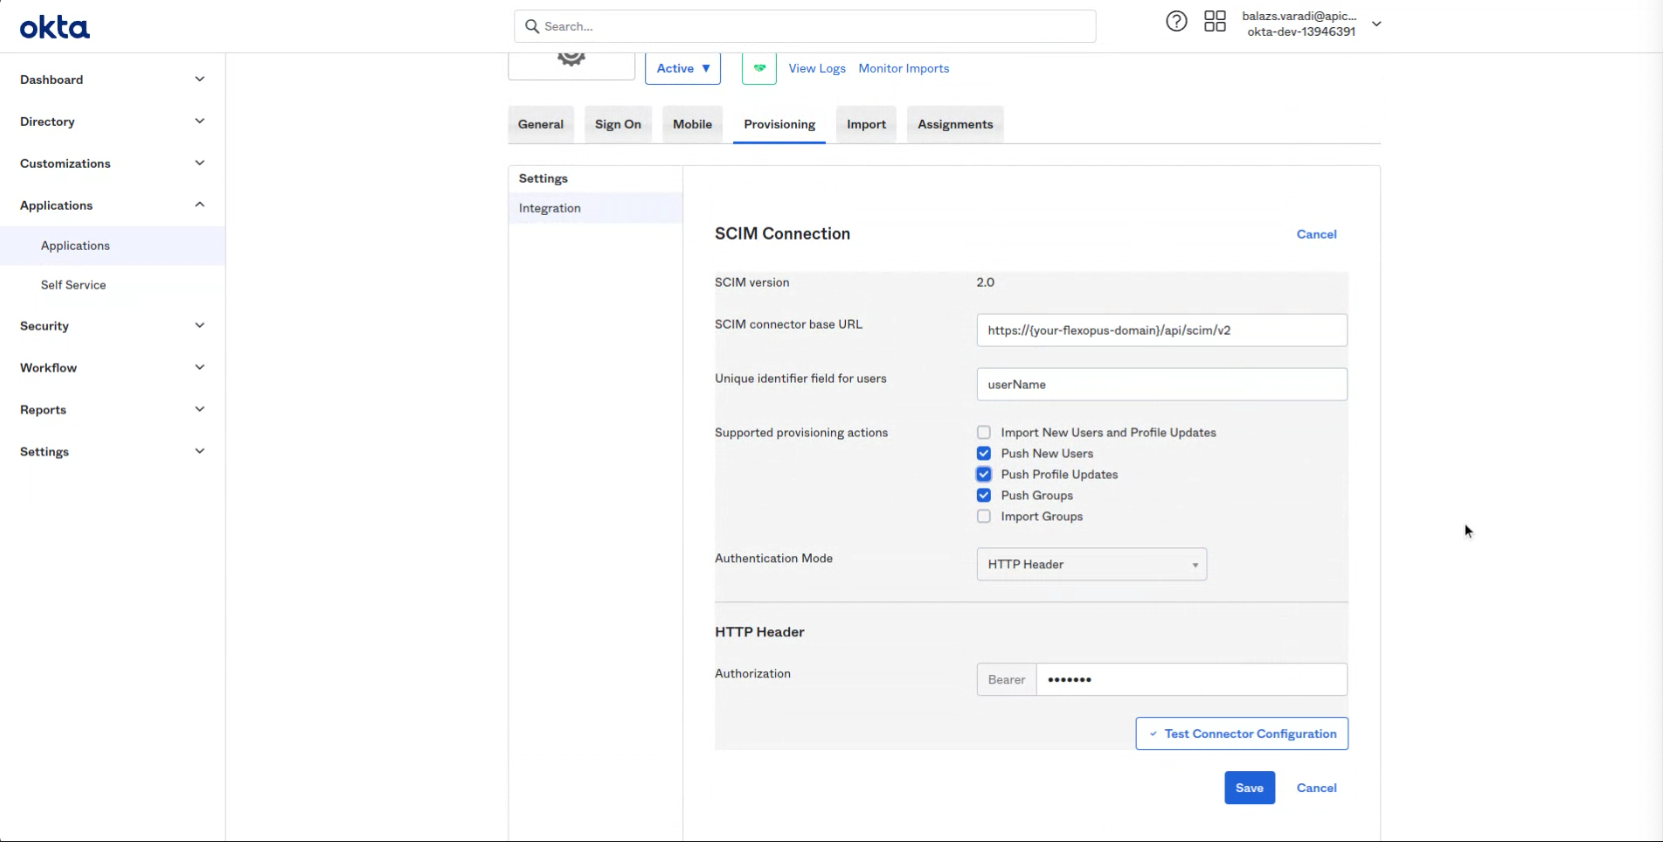
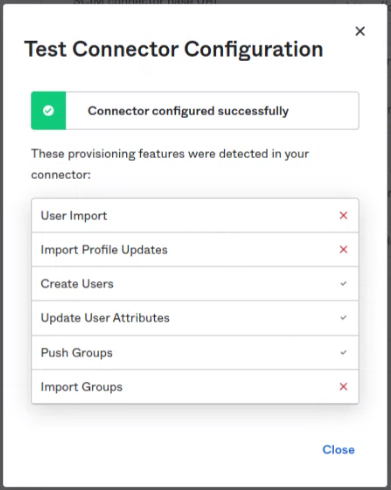
- Click on test. Test results looks like this:
- Save the settings.
- In the Provisioning tab select the "To App" menu point and click on Edit.
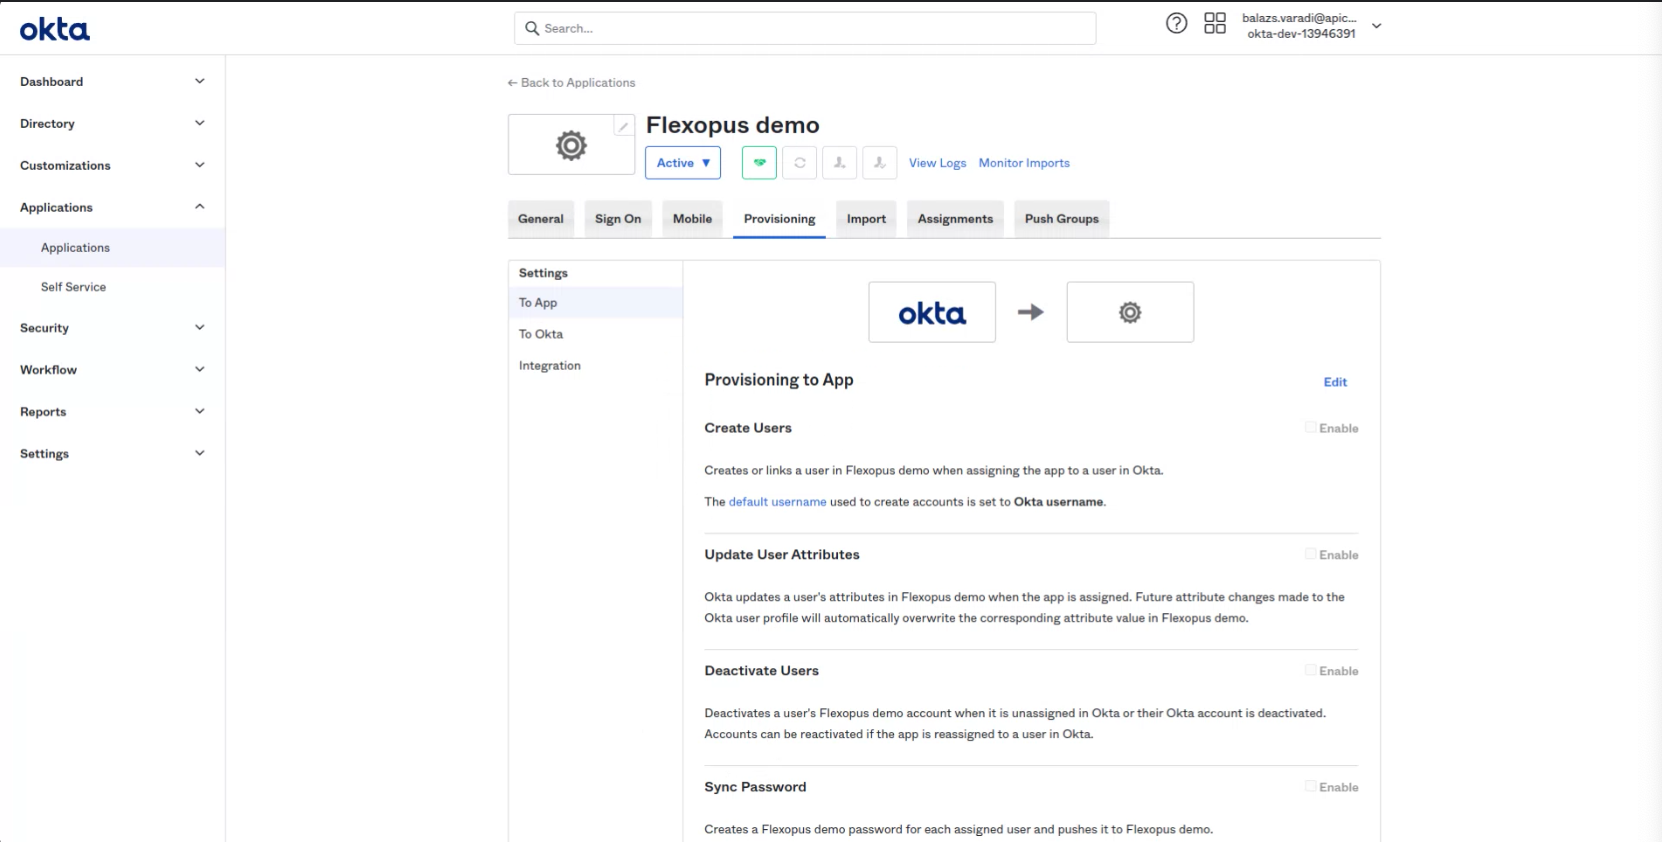
- Enable: Select Create Users
Enable: Update User Attributes
Enable: Deactivate Users
The fourth option is not needed.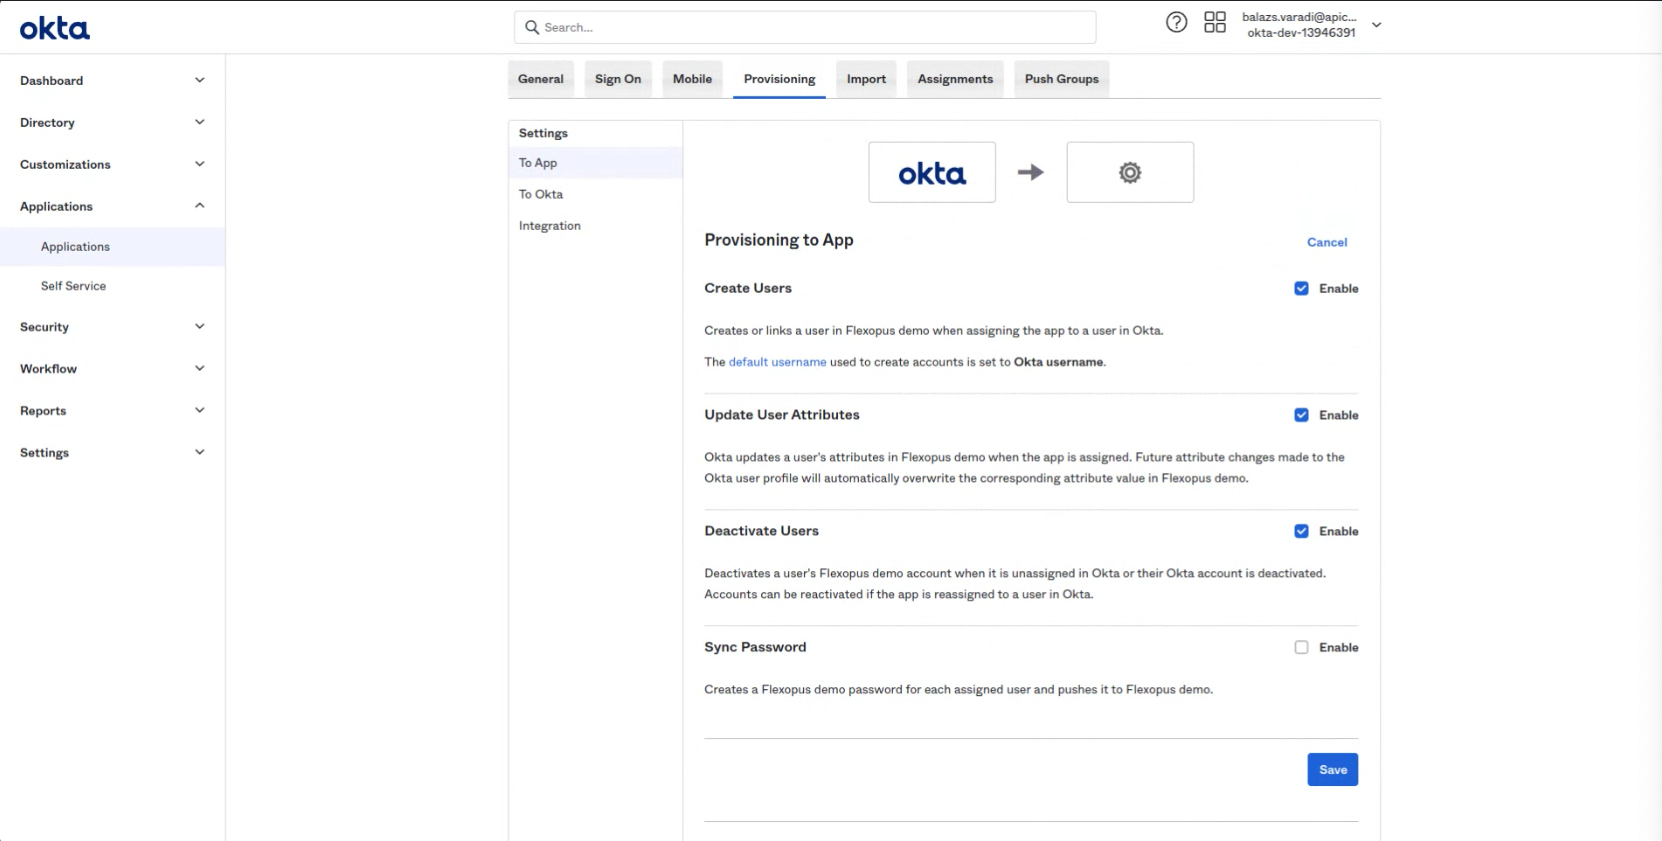
- Edit the attribute mapping to send only the necessary attributes through SCIM to Flexopus.
Only keep the following mappings: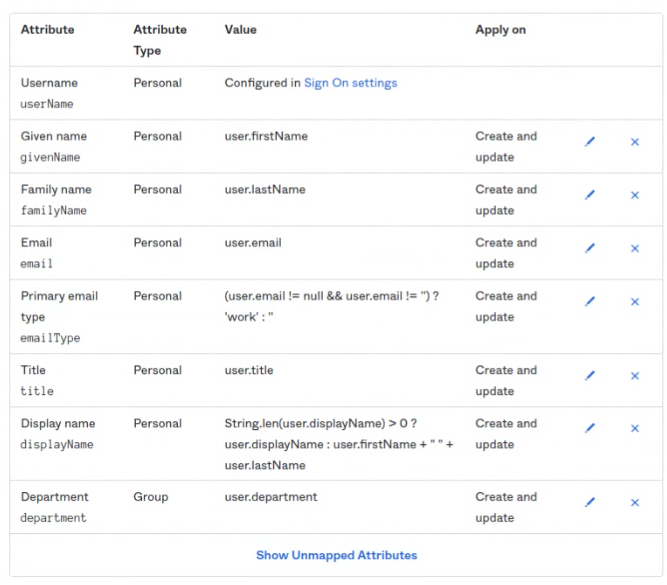
- The Display Name need to be changed.
Attribute value:
Expression
String.len(user.displayName) > 0 ? user.displayName : user.firstName + " " + user.lastName
"Create and Update"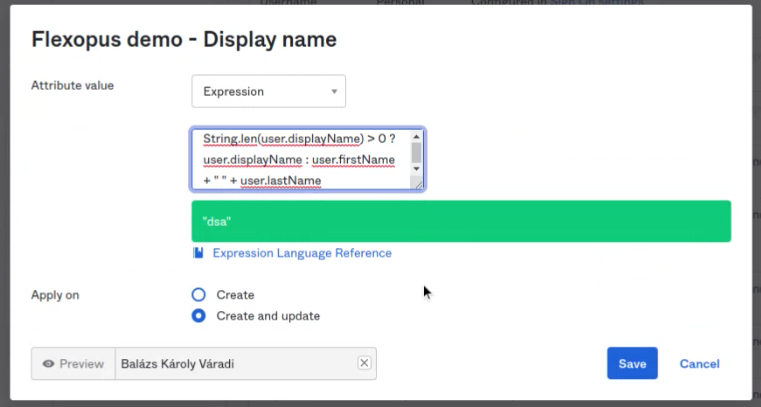
11. Save the settings
12. Test the connection by assigning a group to Flexopus. The groups should be synced to Flexopus within a few minutes.
13. (optional) Troubleshooting:
Please check the configuration manual again or contact our support: support@flexopus.com
OKTA SCIM Workaround
At the current time (2023-10-30), due to a malfunction at Okta, the SCIM interface must be set up in SCIM via a detour. The normal "application" that we used for the SAML2 connection offers the "Provisioning" option, but cannot be used due to a technical error on the part of Okta. The problem has been reported by us to Okta and we hope that it will change in the future. For the time being, you can use the alternative solution as follows:
Vor der Konfiguration lesen!
With Okta, the user groups are synchronized bidirectionally. In other words, you can send groups from Okta to Flexopus, but also from Flexopus to Okta. We don't need the second one, but we can't prevent it either, at least we haven't found a corresponding setting in Okta. For this reason, you should do the following before you configure:
(1) Make sure that the names of the existing Flexopus groups do not overlap with the Okta groups, otherwise Okta will not be able to resolve the groups.
(2) Since the "To Okta" use case is not relevant for us, we can resolve all attribute mappings and limit the data exchange to Okta as much as possible.
- Install new app
Application > Browse App Catalog--> SCIM 2.0 Test App (Header Auth)
- You can rename the application. For example: Flexopus SCIM App

- Unfortunately, SAML2 cannot be configured in this application, so you can skip the settings below with the "Done" button. We have already configured SAML2 with the other application anyway.

- Click on Provisioning and start the settings with "Configure API Integration"

- Base URL: https://{your-flexopus-domain}/api/scim/v2
API Token: Bearer {scim-token}
Important! You must also insert the "Bearer" part!
- Enable: Select Create Users
Enable: Update User Attributes
Enable: Deactivate Users
- Edit the attribute mapping to send only the required attributes to Flexopus via SCIM.
Keep only the following mappings:
- You can then link the groups to the application, to Assignment and to Push Groups.
- Test the connection by assigning a group to Flexopus. The groups should be synchronized with Flexopus within a few minutes.
- (optional) Troubleshooting:
Please check the configuration again or contact our support team: support@flexopus.com
R0087